Easy Cake Pops Designs – Step by Step Tutorial
Picture this: bite-sized spheres of pure joy, perfectly coated in silky chocolate, and decorated so beautifully they look almost too good to eat. That’s the magic of cake pops designs! These adorable treats have stolen my heart (and my kitchen counter space) because they’re incredibly versatile, surprisingly simple, and absolutely crowd-pleasing.
Whether you’re planning a birthday bash, baby shower, or just want to brighten someone’s Tuesday, cake pops are your answer. They’re like my chocolate chip cookies recipe but on a stick and way more Instagram-worthy!
What Are Cake Pops Designs?
Ever wondered why these little beauties are called “pops”? Well, they literally pop with flavor and creativity! The name comes from their lollipop-style presentation – cake on a stick, ready to pop into your mouth. I remember the first time I made them for my niece’s birthday party, and she declared them “magic cake lollipops.”
She wasn’t wrong! As they say, the way to anyone’s heart is through their stomach, and cake pops definitely take the scenic route. Trust me, once you master these adorable treats, you’ll be the star of every gathering!
Why You’ll Love These Cake Pops Designs
The Creative Freedom is Endless
Honestly, this is where cake pops shine brighter than any other dessert. You can transform them into literally anything – from adorable animals to elegant wedding favors. Last month, I made unicorn cake pops for a friend’s daughter, and the joy on that little girl’s face was priceless. The best part? You don’t need to be a professional decorator. With simple techniques and basic supplies, you can create stunning designs that look like they came from a fancy bakery.
Budget-Friendly Baking
Here’s something that might surprise you: making cake pops at home costs a fraction of what you’d pay at specialty shops. A dozen decorated cake pops from a bakery can easily run $30-40, but making them yourself? You’re looking at maybe $10-15 for ingredients. Plus, you probably already have most of what you need in your pantry. It’s similar to my homemade cupcakes recipe, where homemade always wins in both taste and value.
Customization Paradise
The toppings and decorations are where your personality really shines through. Sprinkles, edible glitter, crushed cookies, mini chocolate chips, shredded coconut, candy melts in every color imaginable – the possibilities make my creative brain do happy dances! You can match any party theme, dietary preference, or flavor profile. Want pink and gold for a princess party? Done. Need something elegant for a wedding? Easy. Craving chocolate overload? Say no more!
Ready to dive into the wonderful world of cake pops designs? Let me walk you through everything you need to know to create these showstoppers in your own kitchen.
How to Make Stunning Cake Pops Designs
Quick Overview
Making cake pops is easier than you might think, and the results are absolutely worth it. These treats combine moist, crumbled cake with creamy frosting, rolled into perfect spheres, and decorated however your heart desires. The texture is incredibly smooth and rich, melting in your mouth with every bite. The coating provides a satisfying crunch before you hit that soft, flavorful center.
Time Breakdown:
- Prep Time: 45 minutes
- Chilling Time: 2 hours
- Decorating Time: 30-45 minutes
- Total Time: 3-4 hours
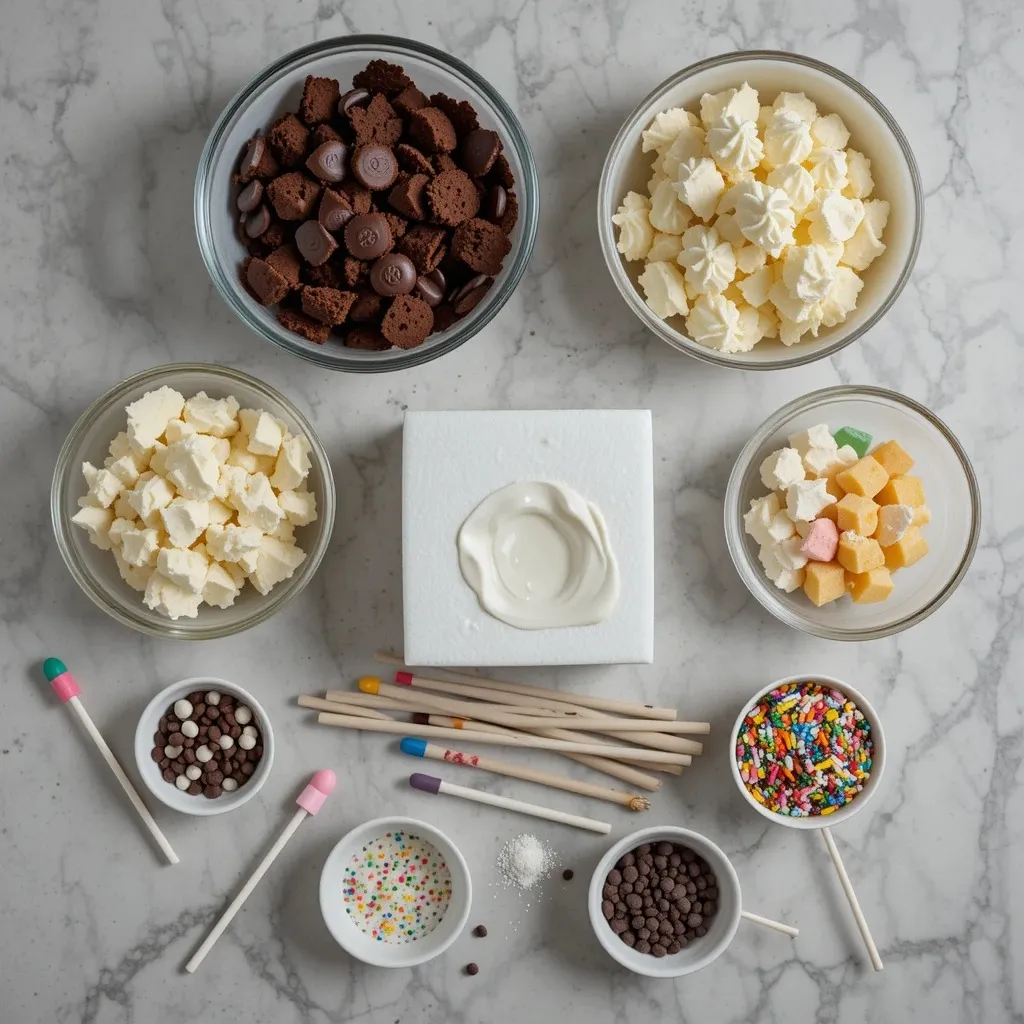
Key Ingredients for Cake Pops Designs
For the Cake Base:
- 1 box cake mix (or homemade cake, about 2 cups crumbled)
- Ingredients required for cake mix (typically eggs, oil, water)
- 1/2 cup frosting (cream cheese or buttercream work best)
For Coating and Decoration:
- 2 cups candy melts or chocolate chips (various colors)
- 2 tablespoons coconut oil or shortening
- 24-30 lollipop sticks or paper straws
- Styrofoam block for drying
For Creative Designs:
- Assorted sprinkles
- Edible glitter or pearl dust
- Mini chocolate chips
- Crushed graham crackers or cookies
- Food coloring pens
- Fondant (optional, for detailed designs)
Step-by-Step Instructions
Preparing Your Cake Base
Start by baking your cake according to package directions or using your favorite recipe. I usually do this the day before to save time. Let it cool completely – and I mean completely. Warm cake will make your pops too mushy. Once cooled, crumble the entire cake into a large bowl using your hands. Break up any large chunks until you have fine, even crumbs. This takes about 5 minutes of therapeutic squishing.
Creating the Perfect Mixture
Add your frosting gradually, starting with just 1/4 cup. Mix thoroughly with your hands or a spoon. You’re looking for a texture similar to cookie dough – it should hold together when squeezed but not be overly wet or sticky. This is crucial! Too much frosting makes them fall apart, too little and they’ll be dry and crumbly. I learned this the hard way when my first batch literally slid off the sticks at a baby shower. Not my finest moment!
Shaping Your Cake Pops
Using a small cookie scoop (about 1.5 tablespoons), portion out your mixture. Roll each portion between your palms to create smooth, round balls. Place them on a parchment-lined baking sheet as you go. Try to make them as uniform as possible – this helps with even coating later. Once all are shaped, pop the entire tray into the refrigerator for at least 2 hours, or freezer for 30 minutes. This firming step is non-negotiable for preventing stick-sliding disasters.
Preparing Your Coating
Melt your candy melts or chocolate in a microwave-safe bowl in 30-second intervals, stirring between each round. Add coconut oil or shortening to thin it out slightly – this creates a smoother, more professional-looking coating. The consistency should be fluid enough to coat easily but thick enough to cling to the cake balls.
Assembling the Pops
Here’s the secret to cake pops that actually stay on the sticks: dip each stick about 1/2 inch into your melted coating first, then insert it straight into a chilled cake ball about halfway through. The coating acts like glue! Let this set for a few minutes before the final coating. This technique changed my cake pop game completely.
Coating and Decorating
Now for the fun part! Dip each cake pop into your melted coating, holding it at a slight angle and rotating gently. Let excess coating drip off – I usually give it a few gentle taps on the bowl rim. While the coating is still wet, add your decorations. Work quickly because the coating sets fast! I like to have all my sprinkles, glitters, and decorations laid out in small bowls beforehand.
Drying and Setting
Stick each finished pop into your styrofoam block to dry completely. This takes about 15-20 minutes at room temperature. Resist the urge to touch them – I know it’s tempting! Once set, you can add additional details like drizzles, food coloring pen designs, or fondant decorations.
Creative Cake Pops Designs to Try
Classic Elegance
Simple doesn’t mean boring! A smooth coating in white, ivory, or pastel colors with a light dusting of edible pearl dust creates sophisticated pops perfect for weddings or formal events. Add a single edible flower or gold leaf for extra wow factor.
Character Creations
Kids absolutely love these! Create animals, cartoon characters, or monsters using candy melts in different colors. Mini chocolate chips make perfect eyes, and you can use fondant or additional candy melts for ears, noses, and other features. My go-to designs include bears, owls, and dinosaurs – they never fail to delight.
Seasonal Sensations
Match your designs to holidays and seasons. Think pastel colors with bunny ears for Easter, orange and black for Halloween, red and green for Christmas, or hearts for Valentine’s Day. I make pumpkin-shaped cake pops every October, and they disappear faster than candy corn at a fall festival.
Elegant Drizzles
Sometimes simple is stunning. Coat your pops in one color, then drizzle with a contrasting shade. White chocolate pops with dark chocolate drizzle look incredibly chic. Add coordinating sprinkles along the drizzle lines for extra texture and visual interest.

What to Serve Cake Pops Designs With
Cake pops are pretty versatile when it comes to serving suggestions. I love displaying them alongside a coffee and tea station at parties – they’re perfect with a warm latte or chamomile tea. For kids’ parties, pair them with fruit punch or chocolate milk.
At dessert tables, arrange them with complementary treats like sugar cookies, brownies, or macarons to create variety. They also look stunning displayed in glass vases filled with colorful candy or beans, creating an edible centerpiece that doubles as decoration.
For adult gatherings, serve them with dessert wines, champagne, or specialty coffee drinks. The bite-sized nature makes them ideal finger food that doesn’t create a mess.
Top Tips for Perfecting Cake Pops Designs
Getting the Texture Right
The cake-to-frosting ratio is everything. Start conservative with frosting – you can always add more, but you can’t take it away. If your mixture is too dry, add frosting one teaspoon at a time. If it’s too wet, add more cake crumbs or refrigerate for 30 minutes to firm up.
Temperature Matters
Cold cake balls in warm (not hot) coating creates the best results. If your coating is too hot, it’ll cause the cake balls to fall apart. If the cake balls are too warm, they’ll slide off the sticks. Aim for coating that’s just melted and smooth, around 90-100°F if you want to get technical.
Stick Selection Strategy
Not all sticks are created equal! Paper lollipop sticks work better than plastic for heavier cake pops. For extra fancy presentations, try using thick paper straws cut to size. The wider diameter provides more support and looks trendy in photos.
Color Coordination
When working with multiple colors, work from lightest to darkest. This prevents color contamination and keeps your candy melts pure. I keep separate spoons for each color and work in batches to maintain color integrity.
Decoration Timing
Apply decorations immediately after coating, while the chocolate is still wet. Have everything prepped and within arm’s reach. Once that coating sets, decorations won’t stick properly. I learned this after trying to add sprinkles to already-set pops – they just bounced right off!
Fixing Common Problems
If a cake pop falls off the stick, don’t panic! Simply remelt a bit of coating, re-dip a fresh stick, reinsert, and let it set longer this time. For cracks in the coating, a light drizzle of the same color coating will cover them beautifully.
Storing and Reheating Tips
Proper storage keeps your cake pops fresh and beautiful for days. Place finished pops in an airtight container with layers separated by parchment paper. They’ll stay fresh at room temperature for 2-3 days, in the refrigerator for up to 1 week, or in the freezer for up to 3 months.
For refrigerated pops, let them come to room temperature before serving – about 30 minutes. This prevents condensation from forming on the coating and brings out the best flavor and texture. Cold cake pops taste a bit dense and the chocolate coating can look dull.
For freezing, wrap each pop individually in plastic wrap, then place in a freezer bag. Thaw in the refrigerator overnight, then bring to room temperature. I always make double batches and freeze half for unexpected guests or last-minute party needs.
Never try to “reheat” cake pops – they’re meant to be enjoyed at room temperature. The coating will melt and create a mess. If you want a warm dessert experience, consider making cake balls without sticks and serving them warm with ice cream instead.
Common Baking Mistakes to Avoid
Over-Mixing the Cake
When crumbling your cake, make sure it’s in fine crumbs, but don’t pulverize it. Some texture is good! Over-mixed cake becomes paste-like and creates dense, heavy pops instead of light, tender ones.
Skipping the Chill Time
I cannot stress this enough – cold cake balls are essential. Room temperature balls will slide right off those sticks faster than you can say “disaster.” Set a timer for the full 2 hours and resist the temptation to rush this step.
Using Too Much Frosting
More isn’t better here! Too much frosting creates overly sweet, mushy pops that can’t hold their shape. Start with less than you think you need. The mixture should be moldable but not wet or sticky.
Overheating the Coating
Microwaving candy melts or chocolate for too long causes them to seize up or become too thin. Use short 30-second bursts and stir thoroughly between each round. Patience wins every time.
Forgetting the Stick-Dip
Always dip your stick in coating before inserting it into the cake ball. This creates an anchor that prevents the dreaded stick-slip situation. This one tip alone will save you so much frustration.
Working Too Slowly
Candy melts and chocolate set quickly! Prepare all your decorations before you start coating. Work in small batches if you’re new to this. There’s nothing more stressful than watching your coating set while you scramble for sprinkles.
Frequently Asked Questions
Why do my cake pops keep falling off the sticks?
This usually happens because the cake balls weren’t chilled enough, the coating was too hot, or you didn’t use the stick-dip technique. Make sure your cake balls are firm and cold, your coating is warm but not hot (around 90-100°F), and always dip the stick in coating before inserting it into the cake ball. Also, don’t insert the stick too deep – halfway through is perfect.
Can I make cake pops without a cake pop maker?
Absolutely! You don’t need any special equipment. The traditional method of crumbling baked cake and mixing it with frosting works perfectly. Cake pop makers create a different texture anyway – more like actual mini cakes rather than the smooth, truffle-like texture most people love.
How far in advance can I make cake pops?
You can make them up to 2 days ahead if stored properly at room temperature, up to a week if refrigerated, or up to 3 months if frozen. For the freshest taste and best appearance, I recommend making them 1-2 days before your event. The coating can develop condensation if refrigerated too long.
What’s the best cake flavor for cake pops?
Any flavor works! Chocolate, vanilla, red velvet, and funfetti are classics. I personally love using chocolate cake with cream cheese frosting or vanilla cake with buttercream. The key is choosing a moist cake – dry cake makes crumbly pops even with plenty of frosting.
Can I use homemade frosting instead of store-bought?
Yes! Homemade frosting works beautifully. Just make sure it’s a thicker consistency like buttercream or cream cheese frosting. Avoid whipped frostings as they’re too airy and won’t bind the cake properly. I actually prefer cream cheese frosting for its tangy flavor that balances the sweetness.
Why is my coating too thick or clumpy?
Candy melts can be finicky. Adding coconut oil or shortening (1-2 tablespoons per 2 cups of candy melts) helps thin them to the perfect consistency. Make sure no water gets into your coating – even a single drop can cause it to seize. If it does seize, you’ll need to start over.
Do I need to use candy melts or can I use regular chocolate?
Both work! Candy melts are easier because they set firm at room temperature and come in many colors. Regular chocolate (with added coconut oil) tastes richer but needs to be refrigerated to stay firm. For outdoor events or warm weather, candy melts are more reliable.
How do I transport cake pops without ruining them?
Use a sturdy cardboard box with styrofoam blocks secured inside. Stick the pops into the foam and ensure the box isn’t too tall (pops shouldn’t touch the lid). Keep them in an air-conditioned car and avoid direct sunlight. I’ve transported hundreds of cake pops this way without a single casualty!
Nutrition Information (Per Cake Pop)
| Nutrient | Amount |
|---|---|
| Calories | 180-220 |
| Total Fat | 8-10g |
| Saturated Fat | 4-5g |
| Cholesterol | 15-20mg |
| Sodium | 140-160mg |
| Total Carbohydrates | 26-30g |
| Sugars | 20-24g |
| Protein | 2-3g |
Note: Nutrition values vary based on cake flavor, frosting type, and coating used.
There’s something incredibly satisfying about creating these little edible masterpieces. Each cake pop is like a tiny canvas where you can express your creativity and bring joy to others. I’ve made them for countless celebrations now, and the reactions never get old. Whether you’re decorating them with your kids on a rainy afternoon, creating elegant favors for a special event, or just treating yourself to something sweet and pretty, cake pops designs offer endless possibilities.
The best part? Every single batch teaches you something new. Maybe you’ll discover a color combination that makes your heart sing, or perhaps you’ll invent a character design that becomes your signature. My unicorn cake pops have become so popular that friends specifically request them for their parties!
Don’t be intimidated by those picture-perfect pops you see online. Start simple, be patient with yourself, and remember that even “ugly” cake pops taste amazing. Some of my most mishapen early attempts were devoured with just as much enthusiasm as my current Pinterest-worthy creations. The joy is in the making, the sharing, and the smiles they create.
So grab that leftover cake (or bake a fresh one), roll up your sleeves, and let your creativity shine. Your first batch of cake pops designs might be humble, but I promise they’ll be delicious. And who knows? You might just discover your new favorite baking obsession. Happy popping!