Easy Sourdough Discard Blueberry Scones – Ready in 40 Minutes
There’s something magical about transforming what most people toss away into buttery, flaky scones bursting with juicy blueberries. These easy sourdough discard blueberry scones are proof that waste-not cooking can taste absolutely divine.
With their golden exterior, tender crumb, and sweet-tart berry pockets, they’re the perfect companion to your morning coffee. What makes these special? They’re ready in under 40 minutes and give your sourdough discard a delicious purpose beyond the compost bin.
What Are Easy Sourdough Discard Blueberry Scones?
Ever wondered why we call them “scones” and not “biscuits with attitude”? These British-born beauties have been gracing tea tables for centuries, and now they’re getting a sourdough twist. By adding that tangy discard you’ve been hoarding in your fridge, you’re creating scones with extra depth and a subtle complexity that makes people ask, “What’s your secret?”
You know what they say—the way to someone’s heart is through their stomach. And trust me, these scones pave a delicious path straight there. Ready to turn your discard into something extraordinary?
Why You’ll Love This Easy Sourdough Discard Blueberry Scones Recipe
The Perfect Solution for Sourdough Discard
Let’s talk about that jar of sourdough discard taking up precious fridge real estate. Instead of feeling guilty every time you feed your starter, you’ll actually look forward to having discard on hand. These scones give your starter’s offspring a purpose while adding that signature tangy flavor that makes everything taste more sophisticated.
The texture is absolutely dreamy—crispy on the outside with a tender, almost cake-like interior. Fresh blueberries burst in your mouth with every bite, creating little pockets of jammy sweetness that contrast beautifully with the buttery dough.
Budget-Friendly Baking at Its Finest
Making scones at home costs a fraction of what you’d pay at a fancy bakery. We’re talking pennies per scone versus several dollars at your local café. Plus, you’re using up something that would otherwise go to waste, making this one of the most economical treats you can bake.
The ingredients are simple pantry staples plus fresh or frozen blueberries. No exotic ingredients or specialty items required. Just honest, delicious baking that won’t break the bank.
Customizable and Crowd-Pleasing
The beauty of this recipe lies in its versatility. Swap blueberries for raspberries, add lemon zest for brightness, or fold in chocolate chips for an indulgent twist. These scones are forgiving and adapt beautifully to whatever you have on hand.
If you loved my sourdough discard pancakes, you’re going to be obsessed with these scones. They share that same tanginess but with a completely different texture experience. Why not make both and have a sourdough discard weekend feast?
Ready to preheat that oven? Let’s get baking and transform your discard into something absolutely irresistible.
How to Make Easy Sourdough Discard Blueberry Scones
Quick Overview
These scones come together faster than you’d think—no fancy techniques or pastry school skills required. The key is keeping everything cold, which creates those coveted flaky layers we all crave in a perfect scone.
The sourdough discard adds moisture and a subtle tang that balances the sweetness beautifully. You’ll love how the dough feels rustic and forgiving, not fussy or temperamental like some pastries.
Total Time:
- Prep Time: 15 minutes
- Chill Time: 15 minutes (optional but recommended)
- Bake Time: 18-22 minutes
- Total: 40-50 minutes
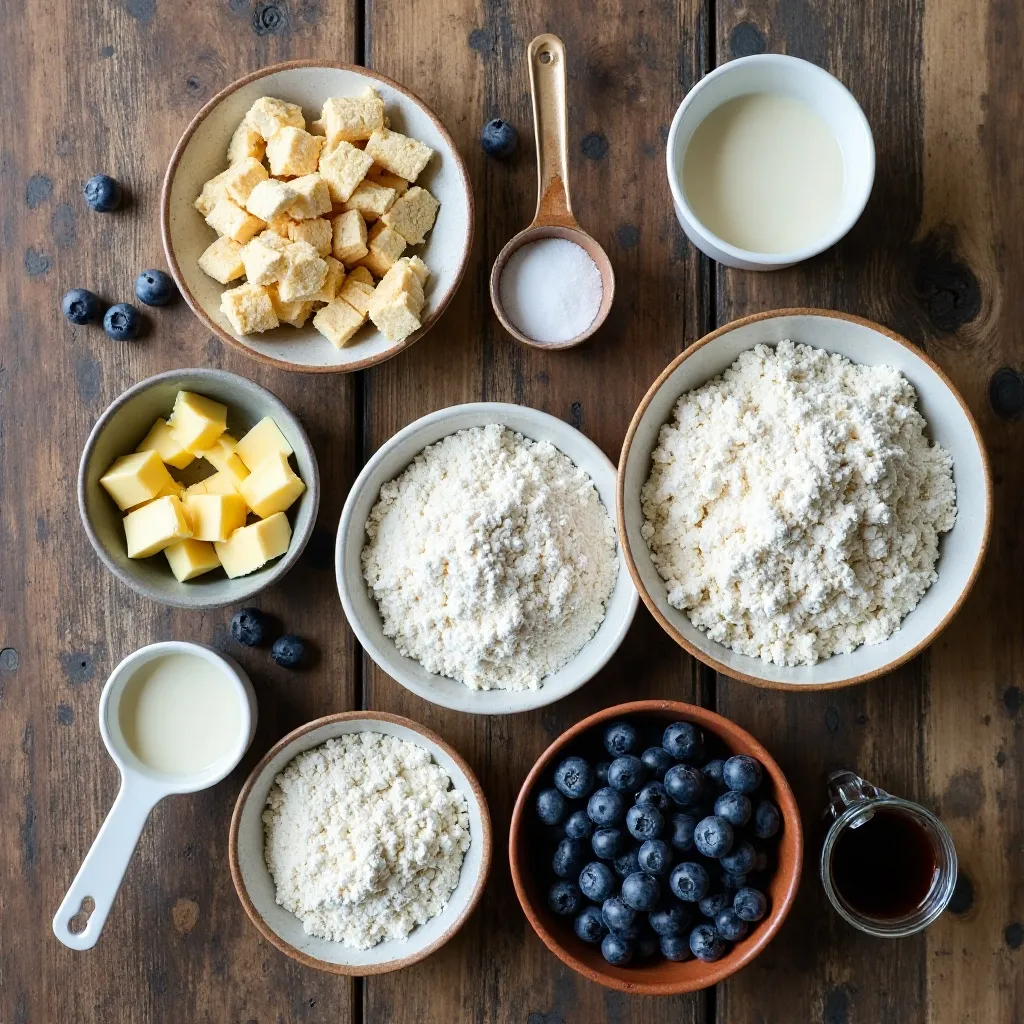
Key Ingredients for Easy Sourdough Discard Blueberry Scones
Dry Ingredients:
- 2 cups all-purpose flour (plus extra for dusting)
- ⅓ cup granulated sugar
- 1 tablespoon baking powder
- ½ teaspoon baking soda
- ½ teaspoon salt
Wet Ingredients:
- 1 cup sourdough discard (unfed, straight from the fridge)
- ½ cup cold heavy cream (plus 2 tablespoons for brushing)
- 6 tablespoons cold unsalted butter (cut into small cubes)
- 1 teaspoon vanilla extract
Mix-Ins:
- 1 cup fresh or frozen blueberries (don’t thaw if frozen)
Optional Topping:
- 2 tablespoons coarse sugar (for sprinkling)
Step-by-Step Instructions
Prepare Your Workspace
Start by preheating your oven to 400°F (200°C). Line a large baking sheet with parchment paper or a silicone baking mat. This prevents sticking and makes cleanup a breeze.
Gather all your ingredients and make sure your butter is very cold. I actually cut my butter into cubes and pop it back in the freezer for 10 minutes while I prep everything else. Cold butter is the secret to flaky layers.
Mix the Dry Ingredients
In a large mixing bowl, whisk together the flour, sugar, baking powder, baking soda, and salt. Make sure everything is evenly distributed. This step ensures your leavening agents are spread throughout the dough so every scone rises beautifully.
Give it a good whisk for about 30 seconds. You want no clumps of baking powder hiding in there.
Cut in the Butter
Add your cold butter cubes to the flour mixture. Using a pastry cutter, two forks, or your fingertips, work the butter into the flour until the mixture resembles coarse crumbs with some pea-sized butter pieces remaining.
Don’t overwork it. Those little butter pieces will create steam pockets during baking, giving you those gorgeous flaky layers. The mixture should look shaggy and rough, not smooth. This takes about 3-4 minutes.
Add the Sourdough Discard and Cream
In a separate small bowl, whisk together your sourdough discard, heavy cream, and vanilla extract. The mixture might look a little separated—that’s totally normal and fine.
Pour this wet mixture into your flour-butter mixture. Using a wooden spoon or spatula, gently stir until just combined. The dough will look shaggy and slightly dry. Don’t worry, we’re about to add the blueberries which will add more moisture.
Fold in the Blueberries
Gently fold in your blueberries, being careful not to crush them. If you’re using frozen berries, add them while still frozen—they’ll release less moisture this way and won’t turn your dough purple.
The dough should come together but still look a bit rough. If it seems too dry to hold together, add one tablespoon of cream at a time, just until it holds its shape.
Shape the Scones
Turn your dough out onto a lightly floured surface. With floured hands, gently pat the dough into a circle about 1 inch thick and 8 inches in diameter. Don’t use a rolling pin—the gentle hand-patting method keeps more air in the dough.
Using a sharp knife or bench scraper, cut the circle into 8 equal wedges, like you’re cutting a pizza. A sharp, straight downward cut is better than a sawing motion, which can seal the edges and prevent rising.
Chill (Optional but Recommended)
Here’s a baker’s secret: if you have time, transfer your cut scones to the prepared baking sheet and pop them in the freezer for 15 minutes or the refrigerator for 30 minutes. This firms up the butter, which means better rise and flakier texture.
If you’re in a hurry, you can skip this step, but your scones will still be delicious—just slightly less sky-high.
Brush and Top
Brush the tops of each scone with heavy cream using a pastry brush. This creates that beautiful golden-brown color we love. Then sprinkle with coarse sugar for a delightful crunch and sparkle.
The sugar topping isn’t just for looks—it adds a wonderful textural contrast to each bite.
Bake to Perfection
Space your scones about 2 inches apart on the baking sheet (they’ll spread slightly). Bake for 18-22 minutes, or until the tops are golden brown and a toothpick inserted into the center comes out clean or with just a few moist crumbs.
The blueberries should be bubbling slightly, and the bottoms should be lightly golden when you peek underneath. Your kitchen will smell absolutely incredible at this point.
Cool and Serve
Let the scones cool on the baking sheet for 5 minutes before transferring them to a wire rack. They’re delicious warm from the oven, but I actually think they’re best about 15 minutes after baking, when the interior has set up perfectly.
Resist the urge to eat them immediately (I know, it’s hard). That brief cooling period makes all the difference in texture.

What to Serve Easy Sourdough Discard Blueberry Scones With
These scones are incredibly versatile and pair beautifully with so many things. Here are my favorite combinations:
For Breakfast or Brunch:
- Hot coffee or tea (Earl Grey is particularly lovely with the blueberries)
- Fresh fruit salad with mint
- Greek yogurt with honey
- Scrambled eggs and crispy bacon
- A smoothie bowl
For Afternoon Tea:
- Clotted cream or whipped cream
- Berry jam or lemon curd
- Fresh berries on the side
- A pot of English Breakfast tea
- Soft butter with a sprinkle of sea salt
For Dessert:
- Vanilla ice cream
- Warm lemon glaze drizzled on top
- Fresh whipped cream with vanilla
- A cup of warm milk before bed
The classic British way is to split them horizontally and spread with butter, jam, and cream. Pure heaven in every bite.
Top Tips for Perfecting Easy Sourdough Discard Blueberry Scones
Keep Everything Cold
This is the golden rule of scone-making. Cold butter creates steam pockets during baking, which gives you those beautiful flaky layers. Work quickly and consider chilling your bowl and even your flour if your kitchen is very warm.
If your hands run hot (like mine do), use a pastry cutter or fork instead of your fingers to work in the butter. Your scones will thank you.
Don’t Overmix the Dough
Once you add the wet ingredients, mix just until combined. Overmixing develops gluten, which makes tough, dense scones instead of tender, flaky ones. The dough should look shaggy and a little rough—that’s perfect.
Think of it like you would muffin batter. A few lumps are your friends here. Embrace the rough texture.
Use Unfed Sourdough Discard
Don’t feel like you need to use freshly fed starter for this recipe. The whole point is using up that discard you’d otherwise throw away. Discard that’s been in the fridge for up to a week works perfectly.
The tangier your discard, the more complex flavor your scones will have. I actually prefer using discard that’s been sitting for 4-5 days.
Choose the Right Blueberries
Fresh blueberries are wonderful, but frozen work just as well—and they’re often more affordable. If using frozen, don’t thaw them first. Frozen berries release less moisture and won’t turn your dough purple.
Toss your berries in a tablespoon of flour before folding them in. This helps prevent them from sinking to the bottom during baking.
Cut Clean, Sharp Wedges
Use a sharp knife or bench scraper and cut straight down without twisting or sawing. This keeps the layers distinct and allows the scones to rise straight up instead of sideways.
Wipe your knife clean between cuts for the neatest wedges.
Adjust Sweetness to Taste
If you prefer less sweet scones, reduce the sugar to ¼ cup. If you like them sweeter (especially for dessert), bump it up to ½ cup. The sourdough tang balances sweetness beautifully, so don’t be afraid to adjust.
Remember, you can always add sweet toppings like jam or honey after baking.
Space Them Properly
Give your scones room to breathe on the baking sheet. They need about 2 inches between each scone to allow for even heat circulation and proper rise. Crowded scones steam instead of bake, resulting in a doughy texture.
If your baking sheet is small, bake in two batches rather than crowding them.
Storing and Reheating Tips
Room Temperature Storage
Freshly baked scones are best enjoyed within 24 hours. Store them in an airtight container at room temperature for up to 2 days. They’ll stay relatively fresh, though they’re definitely at their prime on day one.
Place a paper towel in the bottom of your container to absorb any excess moisture. This keeps the bottoms from getting soggy.
Refrigerator Storage
For longer storage, keep your scones in an airtight container in the refrigerator for up to 5 days. The sourdough’s natural acidity actually helps preserve them slightly longer than regular scones.
Bring them to room temperature or warm them slightly before eating for the best texture and flavor.
Freezing for Later
These scones freeze beautifully. Wrap each scone individually in plastic wrap, then place them all in a freezer-safe bag or container. They’ll keep for up to 3 months in the freezer.
You can also freeze the unbaked, cut scones on a baking sheet until solid, then transfer to a freezer bag. Bake from frozen, adding 3-4 extra minutes to the baking time.
Reheating Instructions
To refresh day-old scones, wrap them in foil and warm in a 300°F oven for 5-7 minutes. This revives that just-baked texture and aroma beautifully.
For frozen scones, thaw overnight in the refrigerator, then warm as directed above. You can also microwave individual scones for 15-20 seconds, though they won’t be quite as crispy.
For an extra-special treat, split warm scones and toast them lightly under the broiler, then spread with butter. The toasted interior gets delightfully crispy while the outside stays tender.
Tips for Avoiding Common Baking Mistakes
Mistake: Dense, Heavy Scones
Solution: This usually happens from overmixing or using butter that wasn’t cold enough. Mix just until the dough comes together, and make sure your butter is very cold. Also, ensure your baking powder is fresh—old leavening agents lose their power.
Check the expiration date on your baking powder. If it’s old, do a quick test: add a teaspoon to hot water. It should fizz vigorously.
Mistake: Scones Spread Instead of Rising
Solution: The dough was too warm. Chill your shaped scones for 15 minutes before baking. Also, make sure you’re not adding too much liquid—the dough should be just barely holding together, not wet.
Work in a cool kitchen when possible, and avoid touching the dough too much with your warm hands.
Mistake: Blueberries Sink to the Bottom
Solution: Toss your blueberries in a tablespoon of flour before adding them to the dough. This helps them stay suspended. Also, fold them in gently at the very end—overmixing can cause them to sink.
Frozen berries actually work better than fresh for preventing sinking. The cold berries hold their position better in the dough.
Mistake: Dry, Crumbly Scones
Solution: Don’t overbake. Check your scones at 18 minutes—they’re done when lightly golden and a toothpick comes out with just a few moist crumbs. Also, make sure you’re measuring flour correctly (spoon it into the measuring cup rather than scooping).
Scones continue to cook slightly after you remove them from the oven, so pull them when they’re just barely done.
Mistake: Uneven Browning
Solution: Rotate your baking sheet halfway through baking. Most ovens have hot spots. Also, make sure your oven is fully preheated and use an oven thermometer to verify the temperature is accurate.
Position your rack in the center of the oven for the most even heat distribution.
Mistake: Soggy Bottoms
Solution: Don’t skip the parchment paper or silicone mat. Also, make sure your oven is hot enough—too low a temperature causes scones to steam rather than bake. Let scones cool on a wire rack so air can circulate underneath.
If your scones consistently have soggy bottoms, try baking them on the lower rack next time.
Frequently Asked Questions
Can I use active sourdough starter instead of discard?
Yes, you can use active starter, but discard works perfectly well and that’s the whole point of this recipe—to use up something you’d otherwise throw away. Active starter will give you the same results since the sourdough isn’t actually fermenting in this quick-bake recipe.
Can I make these scones ahead of time?
Absolutely. Shape the scones and freeze them unbaked on a baking sheet. Once solid, transfer to a freezer bag. Bake from frozen, adding 3-4 extra minutes to the baking time. You can also bake them completely, freeze, and reheat as needed.
What if I don’t have heavy cream?
You can substitute with whole milk mixed with a tablespoon of melted butter, or use half-and-half. The scones won’t be quite as rich, but they’ll still be delicious. In a pinch, even full-fat coconut milk works beautifully.
My sourdough discard is really thick. Should I thin it out?
The consistency of discard varies, but that’s okay. If your discard is very thick (like peanut butter), you might need to add an extra tablespoon or two of cream to the dough. The final dough should be slightly sticky but holdable.
Can I use other fruits besides blueberries?
Definitely. Raspberries, blackberries, chopped strawberries, or diced apples all work wonderfully. Chocolate chips, dried cranberries, or even fresh cherries are delicious too. Stick to about 1 cup of mix-ins for the best texture.
How do I know when the scones are done?
The tops should be golden brown, and a toothpick inserted in the center should come out clean or with just a few moist crumbs (not wet batter). The scones should feel firm to a gentle touch, not squishy.
Can I make mini scones instead?
Yes! Cut your dough circle into 12-16 smaller wedges for petite scones. Reduce the baking time to 12-15 minutes. These are perfect for tea parties or when you want to sample multiple flavors.
Why are my scones tough?
Overworking the dough develops too much gluten, resulting in tough scones. Mix just until combined, handle the dough gently, and avoid kneading. Also, make sure you’re not using bread flour, which has more gluten than all-purpose flour.
Can I make these dairy-free?
Yes, with some substitutions. Use vegan butter (cold), and replace the heavy cream with full-fat coconut cream or a combination of non-dairy milk and melted coconut oil. The texture will be slightly different but still delicious.
How long does sourdough discard last in the fridge?
Discard can last up to 2 weeks in the refrigerator. Just give it a stir before using. If you see any mold or notice an off smell (different from the normal tangy sourdough smell), discard it and start fresh.
Nutrition Information
| Nutrient | Per Scone (1/8 of recipe) |
|---|---|
| Calories | 285 |
| Total Fat | 13g |
| Saturated Fat | 8g |
| Cholesterol | 35mg |
| Sodium | 320mg |
| Total Carbohydrates | 38g |
| Dietary Fiber | 1g |
| Sugars | 12g |
| Protein | 5g |
Nutritional values are approximate and will vary based on specific ingredients used.
Final Thoughts
These easy sourdough discard blueberry scones prove that waste-not baking can taste absolutely incredible. Every time I make a batch, I’m reminded that some of the best recipes come from creative resourcefulness—finding ways to use every bit of our ingredients and turning potential waste into something truly special.
The beauty of these scones is that they’re approachable for bakers of all levels. Whether you’re brand new to sourdough or you’ve been maintaining a starter for years, this recipe welcomes you with open arms. The dough is forgiving, the technique is straightforward, and the results are consistently impressive.
I love making these on weekend mornings when I have a little extra time to enjoy the baking process. The house fills with that irresistible aroma of butter and berries, and there’s something deeply satisfying about pulling golden scones from the oven. They’ve become a staple in my kitchen, and I hope they become one in yours too.
So grab that jar of discard from your fridge, gather some berries, and let’s turn what most people throw away into your new favorite breakfast treat. Your mornings (and your starter) will thank you.
Happy baking!