Easy Kodiak Pancake Mix Biscuits Recipe in 15 Minutes
Imagine biting into a warm, fluffy biscuit that’s golden on the outside and tender on the inside—now imagine it’s packed with protein and ready in just 15 minutes! These kodiak pancake mix biscuits are my absolute favorite kitchen shortcut.
I stumbled upon this recipe on a busy Tuesday morning when I had a pouch of Kodiak mix but no time for pancakes. Here’s a fun fact: Kodiak Cakes was started by a boy scout who sold flapjack mix door-to-door! This recipe transforms that wholesome mix into buttery, satisfying biscuits that’ll make your mornings infinitely easier.
They’re simpler than my popular buttermilk drop biscuits and just as delicious. Trust me, once you try these, you’ll never look at pancake mix the same way again!
What Are Kodiak Pancake Mix Biscuits?
Ever wonder what happens when breakfast meets brilliance? That’s exactly what kodiak pancake mix biscuits are!
These aren’t your grandma’s traditional biscuits (though I’m sure hers were amazing). They’re a modern twist that uses Kodiak’s protein-packed pancake mix as the base instead of plain flour.
The result? Biscuits that are slightly heartier, naturally sweeter, and loaded with whole grains. I call them my “multitasking biscuits” because they work for breakfast, lunch, or dinner.
As they say, the way to anyone’s heart is through their stomach, and these protein-rich beauties certainly deliver! Don’t wait another minute—grab that Kodiak mix from your pantry and let’s bake!
Why You’ll Love This Kodiak Pancake Mix Biscuits Recipe
Protein-Packed Goodness in Every Bite
The star of this recipe is the Kodiak pancake mix itself. Each biscuit contains around 8-10 grams of protein thanks to the whole grain wheat and whey protein in the mix.
This means you’re getting a breakfast that actually keeps you full until lunch. No more mid-morning snack attacks!
The nutty, slightly sweet flavor from the whole grains adds depth that regular biscuits just can’t match. It’s like upgrading from economy to first class.
Budget-Friendly and Pantry-Friendly
Making biscuits from scratch usually requires buttermilk, which often goes bad before you finish the carton. With this recipe, you’re using ingredients you probably already have.
A single pouch of Kodiak mix costs about the same as store-bought biscuits but yields more servings. Plus, you’re getting better nutrition for your money.
Compared to my sour cream biscuits recipe, these require fewer specialty ingredients and still deliver that tender, flaky texture we all crave.
Customize to Your Heart’s Content
What I love most about these biscuits is their versatility. Add shredded cheese and herbs for savory breakfast sandwiches. Brush with honey butter for a sweet treat.
Fold in blueberries or chocolate chips for a dessert-style biscuit. The possibilities make my head spin in the best way!
The neutral-sweet base of Kodiak mix means these biscuits play well with both sweet and savory toppings. Try making a batch this weekend—your family will be asking for them every week!
How to Make Kodiak Pancake Mix Biscuits
Quick Overview
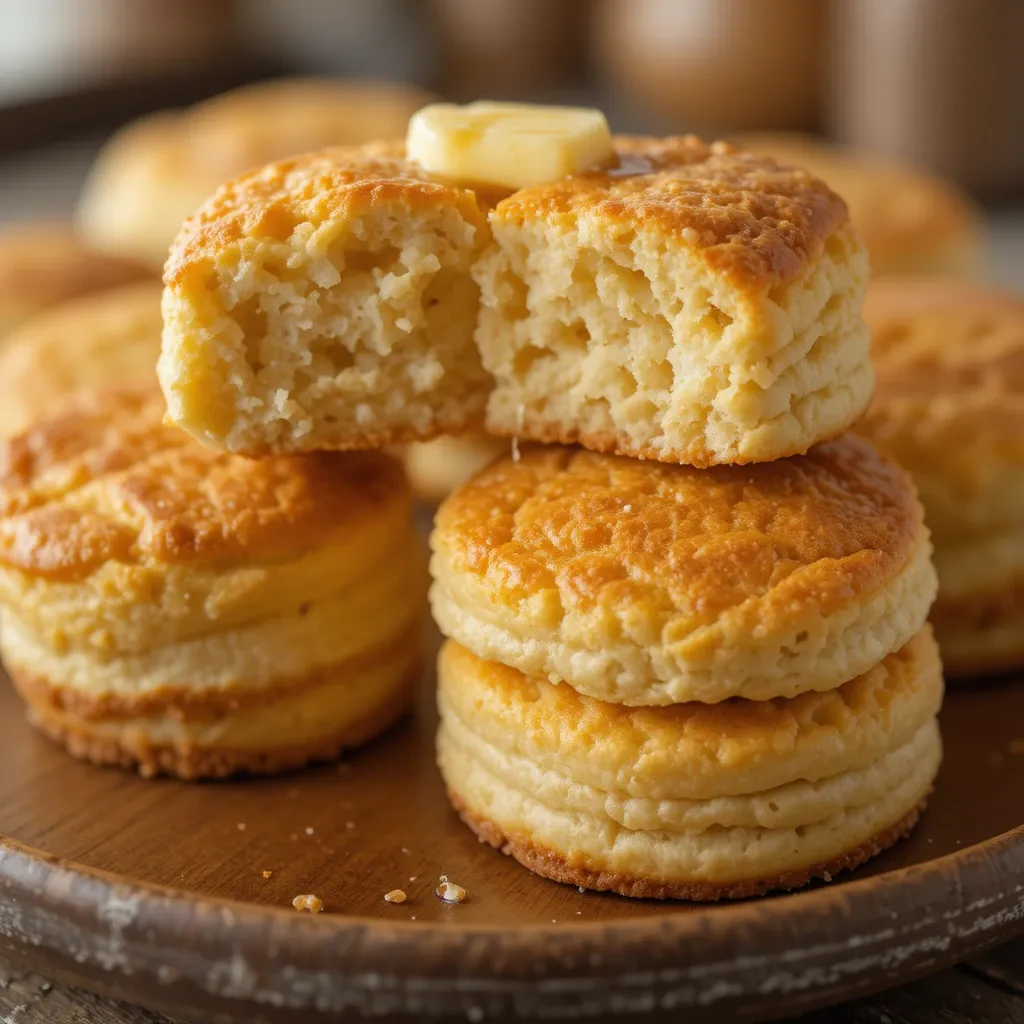
This recipe is perfect for busy mornings because it comes together in about 20 minutes from start to finish.
You’ll love how the biscuits turn out golden and flaky on the outside while staying soft and tender inside. The Kodiak mix gives them a subtle sweetness that pairs perfectly with butter or jam.
The texture is somewhere between a traditional biscuit and a scone—dense enough to be satisfying but light enough to enjoy multiple pieces.
Prep Time: 8 minutes
Cook Time: 12-15 minutes
Total Time: 20-23 minutes
Servings: 8 biscuits
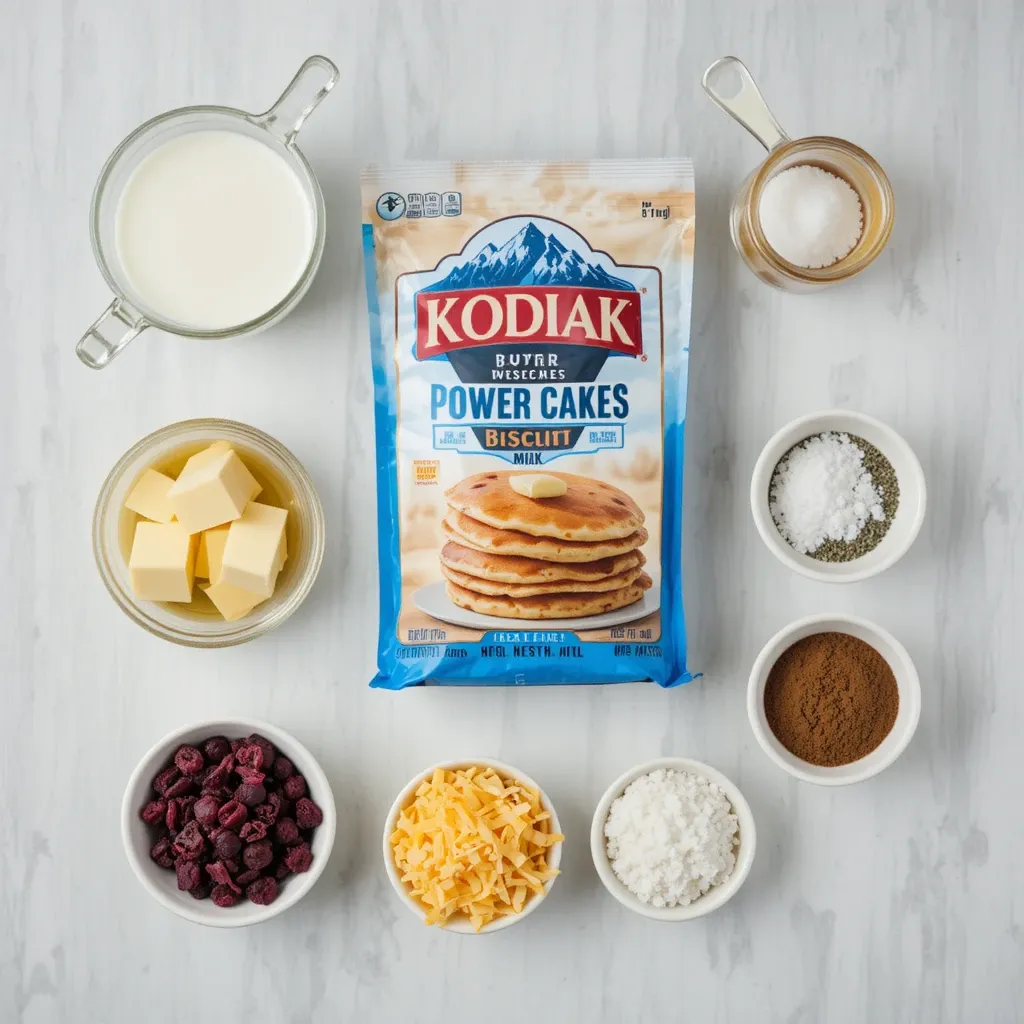
Key Ingredients for Kodiak Pancake Mix Biscuits
- 2 cups Kodiak Power Cakes Pancake Mix (any flavor works, but buttermilk is classic)
- 6 tablespoons cold butter (cut into small cubes)
- 2/3 cup cold milk (whole milk works best, but any will do)
- 1 tablespoon honey (optional, adds extra sweetness)
- Pinch of salt (if using an unsalted butter)
Optional Add-ins:
- 1/2 cup shredded cheddar cheese
- 2 tablespoons fresh chopped herbs (rosemary, thyme, or chives)
- 1/4 cup dried cranberries or blueberries
- 1 teaspoon cinnamon for a sweeter version
Step-by-Step Instructions
Step 1: Preheat and Prep
Preheat your oven to 425°F (220°C). This high temperature is crucial for getting that beautiful golden exterior and tender interior.
Line a baking sheet with parchment paper or lightly grease it with butter. I prefer parchment because it makes cleanup a breeze and prevents any sticking.
Make sure your butter and milk are cold—this is the secret to flaky biscuits! I even pop my butter in the freezer for 10 minutes before starting.
Step 2: Mix the Dry Ingredients
Pour 2 cups of Kodiak pancake mix into a large mixing bowl. If you’re adding any dry ingredients like cinnamon or a pinch of salt, whisk them together now.
The Kodiak mix already contains leavening agents, so you don’t need to add baking powder or baking soda. One less thing to worry about!
Step 3: Cut in the Butter
Add your cold, cubed butter to the Kodiak mix. Using a pastry cutter, two forks, or your fingertips, work the butter into the flour until the mixture resembles coarse crumbs with pea-sized butter pieces.
This step usually takes 2-3 minutes. Don’t overmix—those little butter chunks will create steam pockets in the oven, giving you flaky layers.
My hands tend to be warm, so I use a pastry cutter to keep the butter cold. If you use your fingers, work quickly!
Step 4: Add the Wet Ingredients
Make a well in the center of your butter-flour mixture. Pour in the cold milk and honey (if using) all at once.
Using a wooden spoon or spatula, gently stir the mixture just until it comes together into a shaggy dough. You should still see some dry patches—this is normal!
The dough will be slightly wetter than traditional biscuit dough because of the protein content in Kodiak mix. Don’t panic; this is exactly what we want.
Step 5: Fold and Shape
Turn the dough out onto a lightly floured surface (you can use a bit more Kodiak mix for flouring). Gently pat it into a rectangle about 1 inch thick.
Here’s my secret trick: fold the dough in half, then pat it out again. Repeat this folding process 3-4 times. This creates beautiful layers without overworking the dough.
After your final fold, pat the dough to about 3/4 inch thickness. Don’t roll it with a rolling pin—patting is gentler and keeps those butter pockets intact.
Step 6: Cut the Biscuits
Using a 2.5-inch round biscuit cutter (or a drinking glass), cut straight down through the dough without twisting. Twisting seals the edges and prevents the biscuits from rising properly.
Place the biscuits on your prepared baking sheet about 1 inch apart. They’ll expand slightly during baking.
Gather the scraps, gently pat them together (don’t knead!), and cut out a few more biscuits. The second-cut biscuits won’t be quite as pretty, but they’ll still taste amazing.
Step 7: Optional Butter Brush
For extra richness and a gorgeous golden top, brush the biscuits with melted butter before baking. This step is optional but highly recommended!
I use about 2 tablespoons of melted butter for the whole batch. The butter also helps any toppings stick if you want to sprinkle them with sea salt or everything bagel seasoning.
Step 8: Bake to Perfection
Bake the biscuits in your preheated 425°F oven for 12-15 minutes, until the tops are golden brown and the biscuits have risen beautifully.
Every oven is different, so start checking at the 11-minute mark. You want a deep golden color on top—pale biscuits mean underbaked bottoms.
Remove from the oven and let them cool on the baking sheet for 2-3 minutes before transferring to a wire rack. Resist the urge to eat them immediately (though I rarely succeed at this!).
What to Serve Kodiak Pancake Mix Biscuits With
These versatile biscuits pair beautifully with so many dishes. Here are my favorite serving suggestions:
For Breakfast:
- Scrambled eggs and turkey sausage for a protein-packed morning
- Fresh fruit salad with a drizzle of honey
- Greek yogurt parfait on the side
- Avocado slices with a sprinkle of sea salt and red pepper flakes
For Lunch or Dinner:
- Hearty vegetable soup or chicken noodle soup
- Grilled chicken salad with a tangy vinaigrette
- Turkey chili topped with shredded cheese
- Roasted vegetables and hummus
Sweet Toppings:
- Butter and jam (strawberry is my favorite!)
- Honey butter (mix softened butter with honey)
- Nut butter and sliced bananas
- Cream cheese with a drizzle of maple syrup
Savory Options:
- Make breakfast sandwiches with eggs and cheese
- Top with gravy for a comfort food twist
- Spread with herb butter and serve alongside grilled meats
- Use as sliders for pulled chicken or turkey
Top Tips for Perfecting Kodiak Pancake Mix Biscuits
Keep Everything Cold
The number one rule for flaky biscuits is temperature control. Cold butter creates steam pockets when it hits the hot oven, resulting in those coveted flaky layers.
If your kitchen is warm, chill your bowl in the freezer for 10 minutes before starting. Some bakers even freeze their butter solid and grate it into the flour!
Don’t Overmix the Dough
Overworking biscuit dough develops gluten, which makes tough, dense biscuits. Mix just until the ingredients come together—a few dry streaks are perfectly fine.
When folding the dough, think gentle pressure, not aggressive kneading. You’re creating layers, not making bread.
Use a Sharp Cutter
A dull biscuit cutter or one that isn’t sharp enough will seal the edges of your biscuits, preventing them from rising properly.
Press straight down without twisting. If you’re using a glass, make sure the rim is thin and sharp.
Experiment with Flavors
The beauty of Kodiak mix is that it comes in different flavors—buttermilk, flapjack, dark chocolate, cinnamon oat. Each variety creates slightly different biscuits.
I’ve made these with the cinnamon oat flavor and added dried apples—absolutely incredible! Don’t be afraid to get creative.
Watch Your Oven Temperature
A high temperature (425°F) is essential for proper rise and golden exteriors. If your oven runs hot, reduce to 400°F and add 2-3 minutes to baking time.
Invest in an oven thermometer if you don’t have one—most ovens are off by 25 degrees or more!
Adjust Liquid for Altitude
If you’re baking at high altitude (above 3,000 feet), you may need to add an extra tablespoon or two of milk. The dough should be slightly sticky but still holdable.
Common Baking Mistakes to Avoid
Using Warm Ingredients
This is the biggest mistake I see beginners make. Room temperature butter won’t create the flaky layers you’re after.
Always start with cold butter and cold milk straight from the refrigerator. Your patience will be rewarded with tender, layered biscuits.
Twisting the Biscuit Cutter
When you twist as you cut, you’re essentially pinching the edges of the dough closed. This prevents the biscuits from rising evenly.
Press straight down with confidence, then lift straight up. Clean your cutter between cuts if dough starts sticking.
Rolling Instead of Patting
Rolling pins apply too much pressure and can press out those precious butter pockets. Use your hands to gently pat the dough to the right thickness.
Overbaking
Because Kodiak mix contains whole grains, these biscuits can go from perfectly golden to overdone quickly. Set a timer and check at the lower end of the time range.
The bottoms should be golden but not dark brown. If your bottoms are burning while the tops are pale, lower your oven rack.
Skipping the Folding Step
Those 3-4 folds are what create multiple layers in your biscuits. Don’t skip this step—it only takes an extra minute and makes a huge difference.
Not Measuring the Mix Properly
Scooping flour directly with your measuring cup packs it down, leading to too much flour and dry biscuits.
Fluff your Kodiak mix with a spoon, then spoon it into your measuring cup and level it off with a knife. This ensures accurate measurements.
Storing and Reheating Tips
Room Temperature Storage
Store cooled biscuits in an airtight container or zip-top bag at room temperature for up to 2 days. They’ll stay soft and delicious.
Place a paper towel in the container to absorb any excess moisture, which can make biscuits soggy.
Refrigerator Storage
For longer storage, keep biscuits in the refrigerator for up to 5 days. Store them in an airtight container or wrapped individually in plastic wrap.
The texture might firm up slightly in the fridge, but reheating brings them back to life.
Freezing Instructions
These biscuits freeze beautifully! Let them cool completely, then wrap each biscuit individually in plastic wrap. Place wrapped biscuits in a freezer-safe bag or container.
Freeze for up to 3 months. Label the container with the date so you remember when you made them.
To use frozen biscuits, thaw overnight in the refrigerator or microwave from frozen for 30-45 seconds.
Best Reheating Methods
Oven Method (Best): Preheat oven to 350°F. Wrap biscuits in foil and heat for 8-10 minutes until warmed through. This restores the crispy exterior.
Microwave Method (Fastest): Wrap biscuit in a damp paper towel and microwave for 15-20 seconds. This keeps them soft but won’t restore crispiness.
Toaster Oven Method: Split biscuits in half and toast cut-side down for 2-3 minutes. This creates a crispy surface perfect for butter.
Air Fryer Method: Heat at 320°F for 3-4 minutes. This is my go-to method when reheating just one or two biscuits.
Frequently Asked Questions
Can I make these biscuits without milk?
Absolutely! You can substitute the milk with unsweetened almond milk, oat milk, or coconut milk. Water also works in a pinch, though the biscuits won’t be quite as rich. I’ve even used buttermilk for extra tang, and it was delicious.
What if I don’t have a biscuit cutter?
No problem! Use a drinking glass with a thin rim, a cookie cutter, or even cut the dough into squares with a sharp knife. Square biscuits eliminate scraps entirely and still taste amazing. I actually prefer squares when I’m in a hurry.
Can I make the dough ahead of time?
Yes, but with a caveat. You can cut the biscuits and refrigerate them unbaked for up to 24 hours. Place them on the baking sheet, cover with plastic wrap, and refrigerate. Bake directly from the fridge, adding 2-3 extra minutes to the baking time. The cold dough actually produces even flakier biscuits!
Why are my biscuits flat and not fluffy?
This usually happens for one of three reasons: the butter was too warm and melted into the dough, you overmixed the dough, or your Kodiak mix is old and the leavening agents have lost potency. Make sure to check the expiration date on your pancake mix and keep everything cold!
Can I make these dairy-free?
Yes! Use cold coconut oil or vegan butter in place of regular butter, and substitute your favorite plant-based milk. The texture will be slightly different but still delicious. I recommend refined coconut oil so you don’t get a coconut flavor.
How do I know when the biscuits are done?
Look for a deep golden brown color on top and sides. The biscuits should have risen significantly—about double their original height. If you’re unsure, insert a toothpick into the center; it should come out clean or with just a few moist crumbs.
Can I double this recipe?
Definitely! This recipe doubles and triples easily. Just make sure you’re not overloading your baking sheet—leave enough space between biscuits for air circulation. You may need to bake in batches depending on your oven size.
What’s the difference between Kodiak biscuits and regular biscuits?
Kodiak pancake Mix Biscuits contains whole grain wheat flour, whey protein, and natural leavening agents, making these biscuits higher in protein and fiber than traditional all-purpose flour biscuits. They have a slightly heartier texture and a subtle natural sweetness. Plus, you’re getting about 8-10 grams of protein per biscuit!
Can I make drop biscuits instead of cutting them?
For sure! If you’re short on time, add an extra 2-3 tablespoons of milk to make a wetter dough. Drop spoonfuls onto your baking sheet and bake as directed. They won’t be as pretty, but they’ll taste just as good and save you several minutes.
Are these biscuits sweet or savory?
They’re naturally in between! The Kodiak mix has a subtle sweetness from whole grains, but it’s not overwhelming. This makes them incredibly versatile—perfect with jam for breakfast or alongside soup for dinner. You can push them in either direction by adding honey (sweeter) or cheese and herbs (more savory).
Nutrition Information
| Nutrient | Per Biscuit |
|---|---|
| Calories | 180 |
| Protein | 9g |
| Carbohydrates | 20g |
| Dietary Fiber | 2g |
| Total Fat | 8g |
| Saturated Fat | 5g |
| Cholesterol | 20mg |
| Sodium | 280mg |
| Sugars | 4g |
Note: Nutrition information is approximate and based on using whole milk and salted butter. Values may vary depending on specific ingredients used and serving size.