Best Red Velvet Sourdough Bagels – Easier Than You Think
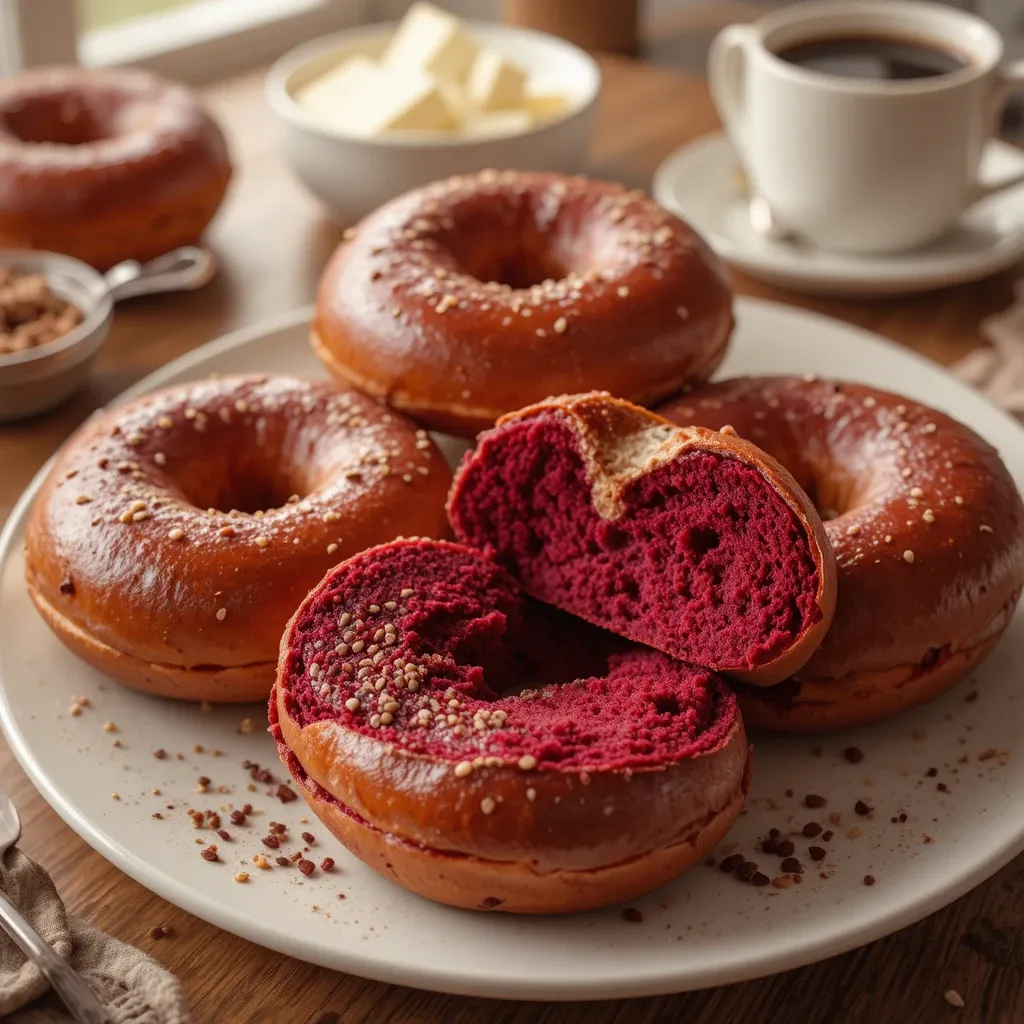
Imagine biting into a perfectly chewy bagel with the most gorgeous deep red color and a hint of cocoa sweetness. These red velvet sourdough bagels are everything you love about classic bagels with an exciting, eye-catching twist that’ll make your breakfast table feel like a celebration.
I stumbled upon this idea last Valentine’s Day when I wanted something special but not too sweet for brunch. The tangy sourdough paired with cocoa and that signature red velvet flavor creates magic in every bite.
These bagels are surprisingly simple to make, ready in about 24 hours (mostly hands-off fermentation time), and absolutely perfect for impressing guests or treating your family. If you loved my cinnamon raisin sourdough bread, you’re going to flip for these beauties!
What Are Red Velvet Sourdough Bagels?
Ever wonder what happens when a classic New York bagel meets Southern red velvet cake? You get these stunning crimson beauties! The name itself sounds fancy, but honestly, it’s just a traditional sourdough bagel recipe with cocoa powder and natural food coloring mixed in.
Remember the old saying, “the way to a man’s heart is through his stomach”? Well, these gorgeous bagels work every single time. The tangy sourdough flavor balances perfectly with the subtle sweetness and cocoa notes. Trust me, once you make these, you’ll want them on repeat!
Why You’ll Love This Red Velvet Sourdough Bagels Recipe
The star of this recipe is definitely the incredible texture you get from the sourdough fermentation. That long, slow rise creates those perfect air pockets and that signature chewiness we all crave in a great bagel. The crust gets beautifully shiny from the boiling step, while the inside stays soft and tender.
Making bagels at home saves you serious money compared to artisan bakery prices. Plus, you control exactly what goes into them – no weird preservatives or artificial ingredients. You’re looking at pennies per bagel versus several dollars at specialty shops.
The toppings are where you can really get creative. I love cream cheese frosting for a true red velvet experience, but everything seasoning, sesame seeds, or even a simple schmear of plain cream cheese works wonderfully. The cocoa flavor is subtle enough that these work for both sweet and savory applications.
These remind me of my chocolate chip sourdough bread recipe, but with that distinct bagel texture. If you enjoy fun twists on traditional sourdough bakes, definitely check that one out too. Let’s get baking and create something truly special in your kitchen!
How to Make Red Velvet Sourdough Bagels
Quick Overview
This recipe combines the best of sourdough baking with the visual wow-factor of red velvet. The process is straightforward – mix your dough, let it ferment overnight, shape into bagels, boil them briefly, then bake until perfect. The sourdough starter gives these bagels an incredible depth of flavor and that classic tangy taste.
The cocoa powder adds a subtle chocolate note without making them taste like dessert. You’ll love how the red color stays vibrant even after baking.
Time Breakdown:
- Active prep time: 30 minutes
- Fermentation time: 12-18 hours
- Shaping and proofing: 2 hours
- Boiling and baking: 30 minutes
- Total time: About 24 hours (mostly hands-off)
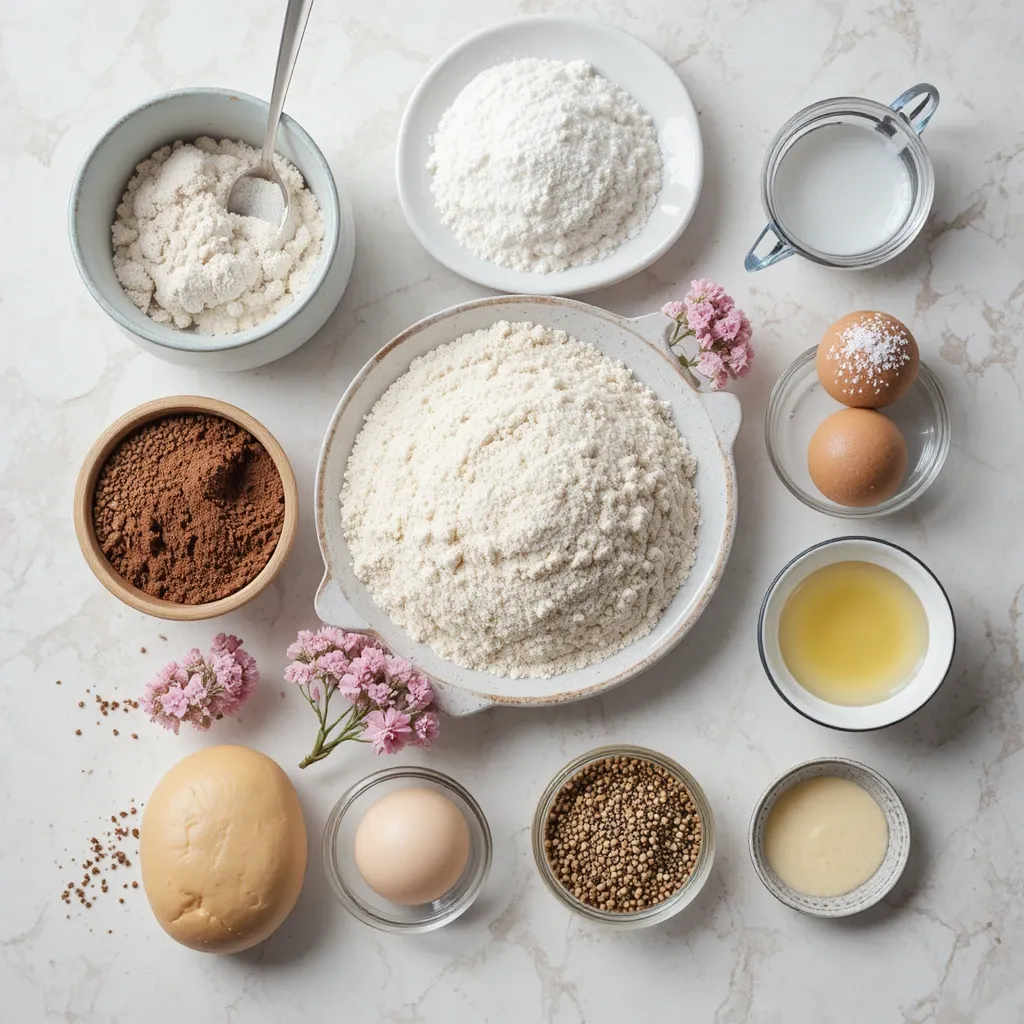
Key Ingredients for Red Velvet Sourdough Bagels
For the Bagel Dough:
- 100g active sourdough starter (bubbly and fed)
- 300g warm water
- 500g bread flour
- 15g cocoa powder (unsweetened)
- 10g salt
- 25g honey or sugar
- Red gel food coloring (1-2 teaspoons, depending on desired intensity)
- 5g white vinegar (for that classic red velvet tang)
For Boiling:
- 2 liters water
- 2 tablespoons honey or brown sugar
- 1 tablespoon baking soda
Optional Toppings:
- Cream cheese (for spreading)
- Everything bagel seasoning
- Sesame seeds
- Poppy seeds
- Sea salt flakes
Step-by-Step Instructions
Step 1: Prepare Your Sourdough Starter
Make sure your sourdough starter is active and bubbly. Feed it 4-6 hours before you plan to start mixing your dough. You want it at peak activity – it should have doubled in size and pass the float test (a small spoonful should float in water).
Step 2: Mix the Dough
In a large mixing bowl, combine the warm water and active sourdough starter. Stir until the starter dissolves into the water. Add the honey and mix well.
In a separate bowl, whisk together the bread flour, cocoa powder, and salt. This ensures the cocoa is evenly distributed throughout the flour.
Add the dry ingredients to the wet ingredients. Mix with a wooden spoon or your hands until no dry flour remains. The dough will be quite stiff and shaggy at this point – that’s exactly what you want.
Add the red food coloring and white vinegar. I like to make a small well in the dough and pour them in, then knead until the color is completely uniform. Wear gloves for this part unless you want red hands for a day! The dough should be a deep, rich red color.
Step 3: First Fermentation
Cover the bowl with a damp tea towel or plastic wrap. Let the dough ferment at room temperature (around 70-75°F) for 12-18 hours. The dough should increase in size by about 50% and develop a slightly domed top. Don’t expect it to double like regular bread dough – bagel dough is denser.
During this time, the sourdough starter works its magic, developing complex flavors and making the dough easier to digest.
Step 4: Divide and Shape
Once fermentation is complete, turn the dough out onto a clean work surface. You don’t need flour because bagel dough isn’t sticky.
Divide the dough into 8 equal pieces (about 115g each for standard-sized bagels). You can use a kitchen scale for precision.
To shape each bagel, roll a piece of dough into a smooth ball. Poke your thumb through the center to create a hole. Gently stretch and rotate the dough around your fingers, enlarging the hole to about 2 inches in diameter. The hole will shrink during proofing and baking, so make it bigger than you think you need.
Step 5: Second Proof
Place the shaped bagels on a parchment-lined baking sheet, leaving about 2 inches between each one. Cover loosely with a damp towel.
Let them proof at room temperature for 1-2 hours. They should look slightly puffy but won’t double in size. To test if they’re ready, do the float test – place one bagel in a bowl of room temperature water. If it floats within 10 seconds, they’re ready to boil.
Step 6: Prepare for Boiling
Preheat your oven to 425°F (220°C). Line two baking sheets with parchment paper.
Bring a large pot of water to a boil. Add the honey (or brown sugar) and baking soda. The baking soda helps create that shiny, golden crust.
Step 7: Boil the Bagels
Working in batches of 2-3 bagels at a time, carefully lower them into the boiling water. Boil for 30 seconds on one side, then flip and boil for another 30 seconds.
Don’t skip this step! Boiling is what gives bagels their distinctive chewy crust and dense interior. The brief boiling also sets the crust before baking.
Use a slotted spoon to remove the bagels, letting excess water drain off. Place them back on the parchment-lined baking sheets.
Step 8: Add Toppings (Optional)
If you’re using toppings like sesame seeds or everything seasoning, sprinkle them on immediately after boiling while the bagels are still wet. This helps the toppings stick.
Step 9: Bake to Perfection
Bake the bagels for 20-25 minutes, rotating the pans halfway through. They’re done when they’re deep burgundy-red with slightly darker edges, and they sound hollow when tapped on the bottom.
The internal temperature should reach about 200°F if you want to be precise.
Step 10: Cool and Enjoy
Transfer the bagels to a cooling rack. Let them cool for at least 15 minutes before slicing. I know it’s tempting to dive right in, but letting them cool slightly improves the texture.
Slice horizontally and toast if desired. Spread with cream cheese or your favorite topping and enjoy your homemade masterpiece!
What to Serve Red Velvet Sourdough Bagels With
These versatile bagels work beautifully with both sweet and savory toppings.
For a classic red velvet experience, spread cream cheese frosting on a toasted bagel. The slight tang from the cream cheese complements the cocoa notes perfectly.
Savory options work wonderfully too. Try regular cream cheese with smoked salmon, capers, and red onions. The subtle sweetness of the bagel adds an interesting dimension.
Make breakfast sandwiches with scrambled eggs, crispy turkey bacon, and a slice of cheddar cheese. The cocoa flavor isn’t overwhelming, so it works surprisingly well.
Pair with fresh fruit like strawberries or raspberries for a beautiful color-coordinated breakfast spread.
For drinks, these are perfect with your morning coffee or a vanilla latte. Hot chocolate makes a decadent pairing if you’re embracing the chocolate connection. Fresh orange juice provides a bright, refreshing contrast.
Top Tips for Perfecting Red Velvet Sourdough Bagels
Use Bread Flour for Best Results
The higher protein content in bread flour (usually 12-14%) creates more gluten, which gives bagels their characteristic chewy texture. All-purpose flour will work in a pinch, but your bagels won’t be quite as chewy.
Don’t Over-Ferment
Watch your dough during the long fermentation. If your kitchen is particularly warm, check it after 10 hours. Over-fermented dough will be too loose and difficult to shape. The dough should smell pleasantly tangy but not overly sour or alcoholic.
Make the Holes Larger Than You Think
Bagel holes shrink significantly during proofing and baking. Make them about 2 inches in diameter after shaping. If the holes are too small, they might close up completely during baking.
Use Gel Food Coloring
Liquid food coloring will make your dough too wet. Gel or paste food coloring provides vibrant color without affecting the dough consistency. Start with less than you think you need – you can always add more, but you can’t take it away.
Don’t Skip the Float Test
Before boiling all your bagels, test one to make sure they’re properly proofed. An under-proofed bagel will sink and stay at the bottom. A properly proofed bagel will float within 10 seconds. This simple test prevents disappointment.
Control Your Boiling Time
More boiling time equals a thicker, chewier crust. Less boiling time means a thinner, softer crust. I find 30 seconds per side is the sweet spot, but you can experiment based on your preference.
Adjust Cocoa Amount for Flavor
If you want a more pronounced chocolate flavor, increase the cocoa powder to 20-25g. Keep in mind this will darken the color and make the flavor more dessert-like.
Steam Creates Better Crust
For an extra shiny crust, place a pan of hot water on the bottom oven rack while baking. The steam helps develop that professional-looking glossy finish.
Storing and Reheating Tips
Room Temperature Storage:
Store cooled bagels in a paper bag or bread box at room temperature for up to 2 days. Avoid plastic bags for room temperature storage – they trap moisture and make the crust soft and chewy (and not in a good way).
Refrigerator Storage:
I don’t recommend refrigerating bagels as it makes them stale faster. Refrigeration causes the starch to crystallize, resulting in a tough, dry texture.
Freezing for Long-Term Storage:
Bagels freeze beautifully! Slice them in half before freezing (easier to toast later). Wrap each bagel individually in plastic wrap, then place all wrapped bagels in a freezer bag. They’ll stay fresh for up to 3 months.
Label the bag with the date so you remember when you made them.
Reheating Instructions:
For fresh bagels (1-2 days old), simply slice and toast in your regular toaster until warmed through and slightly crispy.
For frozen bagels, you can toast directly from frozen – just add an extra minute to your toasting time. No need to thaw first.
For a softer texture, wrap a frozen bagel half in a damp paper towel and microwave for 20-30 seconds, then toast briefly if desired.
To refresh day-old bagels, run them quickly under water (yes, really!), then bake at 350°F for 5-7 minutes. This restores moisture and improves texture significantly.
Tips for Avoiding Common Baking Mistakes
Problem: Bagels Are Too Dense
This usually means your sourdough starter wasn’t active enough. Always make sure your starter is bubbly and has doubled before using it. Feed it 4-6 hours before mixing your dough.
Problem: Dough Is Too Sticky to Shape
Bagel dough should be quite stiff, much stiffer than regular bread dough. If yours is sticky, you may have added too much water or not enough flour. Next time, hold back 20-30g of water and add it only if needed.
Problem: Uneven Color Distribution
Make sure to knead the food coloring thoroughly into the dough. It takes a few minutes of kneading to get completely uniform color. Don’t rush this step.
Problem: Holes Closing Up During Baking
Make the holes larger during shaping – at least 2 inches in diameter. The dough relaxes and the holes shrink during proofing and baking.
Problem: Bagels Are Flat
This could be over-proofing or water that’s too hot when boiling. Make sure your dough doesn’t over-proof (do the float test), and keep the boiling water at a gentle boil, not a rolling boil.
Problem: Pale Color After Baking
Add more food coloring to your dough. Also, make sure you’re boiling them in water with honey or sugar – this helps develop the color and shine.
Problem: Tough, Rubbery Texture
This happens when bagels are over-boiled or over-baked. Stick to 30 seconds per side for boiling, and watch them carefully during the last few minutes of baking.
Problem: Sourdough Starter Isn’t Ready
If you’re new to sourdough, don’t rush the starter. A young starter (less than 2 weeks old) might not have enough strength to properly leaven bagels. Wait until your starter is mature and consistently doubles within 4-6 hours of feeding.
Frequently Asked Questions
Can I make red velvet sourdough bagels without a stand mixer?
Absolutely! Bagel dough is actually easier to mix by hand because it’s so stiff. Just mix until all ingredients are combined, then knead for a few minutes to develop the gluten. Your hands work perfectly fine for this recipe.
What can I use instead of red food coloring?
For a natural approach, try using beet powder or freeze-dried strawberry powder. Keep in mind these will affect the flavor slightly and won’t give you as vibrant a red color. You’ll need about 2-3 tablespoons of beet powder to achieve a decent red hue.
How do I know if my sourdough starter is active enough?
Your starter should be bubbly, have doubled in size within 4-6 hours of feeding, and pass the float test. Drop a spoonful in water – if it floats, it’s ready to use. An active starter smells pleasantly tangy and yeasty, not overly sour or alcoholic.
Can I make these bagels sweet instead of savory?
Yes! Increase the sugar to 40-50g in the dough and add a teaspoon of vanilla extract. Top with cream cheese frosting and crushed pecans for a true red velvet dessert experience.
Why do I need to boil bagels before baking?
Boiling sets the crust and creates that distinctive chewy exterior that makes bagels different from regular bread. The brief boil gelatinizes the starches on the surface, creating a shiny, crispy crust while keeping the inside soft.
Can I use instant yeast instead of sourdough starter?
While you can make red velvet bagels with instant yeast (use 7g instant yeast and reduce fermentation time to 1-2 hours), you’ll lose that complex sourdough flavor. The recipe won’t be “sourdough” anymore, but it will still work.
My dough didn’t rise much during fermentation. What happened?
Bagel dough is very stiff and won’t rise as dramatically as regular bread dough. Expect about 50% increase in volume, not doubling. If there’s no rise at all, your starter might not have been active enough, or your room was too cold.
Can I add mix-ins like chocolate chips?
Yes, but add them during the final shaping step, not during mixing. Press chocolate chips into the surface of shaped bagels before the second proof. Adding them to the dough makes shaping difficult.
How long can I keep the dough in the fridge?
You can cold-ferment the dough in the refrigerator for up to 48 hours after the initial mix. This develops even more flavor. Just bring it to room temperature for about an hour before shaping.
What’s the best way to slice a bagel safely?
Always slice horizontally with the bagel on a cutting board, never in your hand. Use a sharp serrated knife and a gentle sawing motion. Better yet, invest in a bagel slicer for safety.
Nutrition Information
| Nutrient | Per Bagel (1/8 recipe) |
|---|---|
| Calories | 245 |
| Total Fat | 1.5g |
| Saturated Fat | 0.3g |
| Cholesterol | 0mg |
| Sodium | 485mg |
| Total Carbohydrates | 50g |
| Dietary Fiber | 2.5g |
| Sugars | 4g |
| Protein | 8g |
Note: Nutrition information is approximate and based on the bagel only, without toppings or spreads
These red velvet sourdough bagels have become my go-to recipe when I want to make something special without too much effort. The long fermentation time is mostly hands-off, and the result is absolutely stunning.
Whether you’re making them for Valentine’s Day, a birthday brunch, or just because you deserve something beautiful on a Tuesday morning, these bagels deliver every single time. The combination of tangy sourdough, subtle cocoa, and that gorgeous red color makes them truly unforgettable. Happy baking!