Easy Sourdough Discard Blueberry Bagels – Better Than Bakery
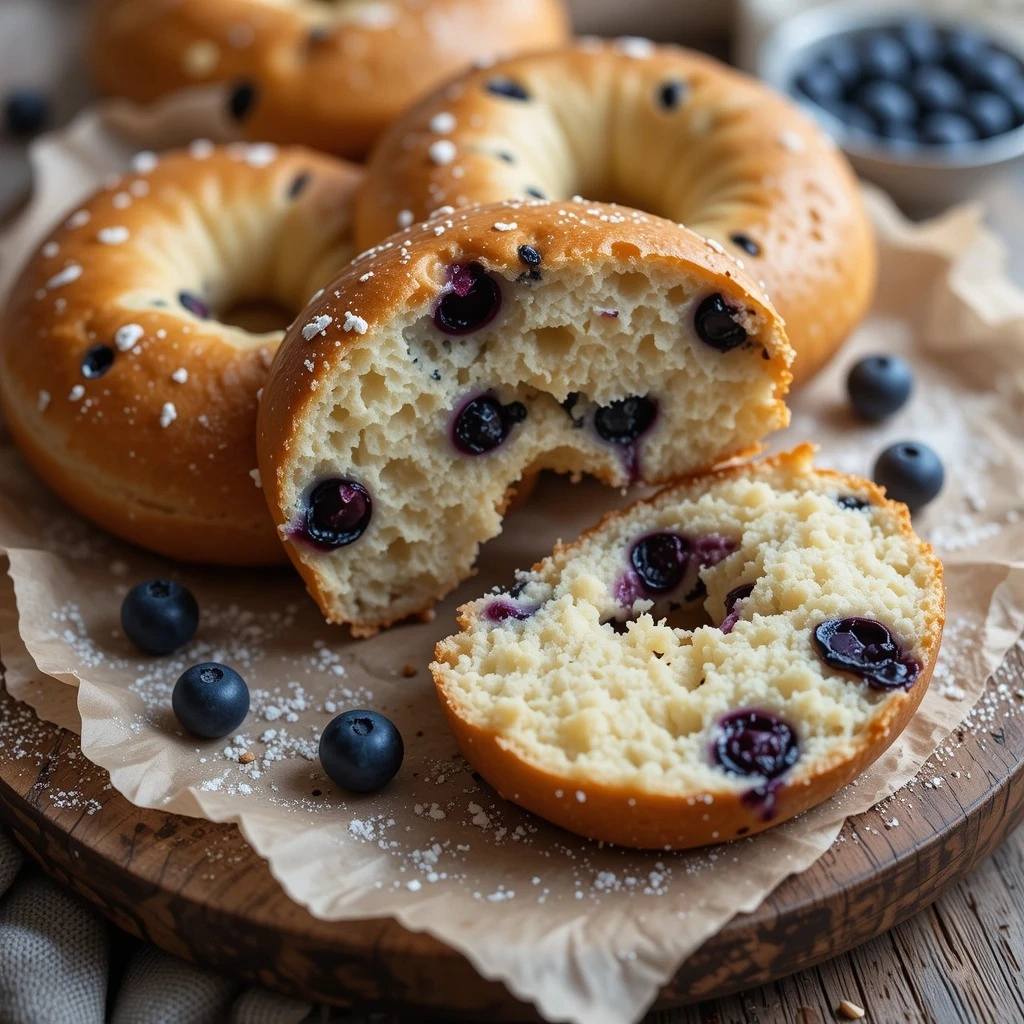
If you’re looking for a creative way to use that sourdough discard sitting in your fridge, these sourdough discard blueberry bagels are about to become your new favorite breakfast treat! Imagine biting into a chewy, golden bagel studded with sweet, juicy blueberries and kissed with the subtle tang of sourdough.
These bagels are surprisingly simple to make, don’t require an overnight rise, and are absolutely perfect for weekend baking with the family. Did you know that bagels were originally boiled before baking to create that signature chewy crust?
This recipe follows that traditional method while incorporating your precious sourdough discard, making it both delicious and practical. Much like our popular sourdough discard pancakes, this recipe ensures nothing goes to waste while creating something truly special. Get ready to fill your kitchen with the irresistible aroma of fresh-baked bagels!
What Are Sourdough Discard Blueberry Bagels?
Ever wondered what happens when you combine the tangy magic of sourdough with the sweet burst of blueberries in bagel form? That’s exactly what sourdough discard blueberry bagels are! These aren’t your ordinary store-bought bagels.
They’re a creative way to rescue that sourdough starter you’d otherwise toss out, transforming it into chewy, flavorful breakfast rings that’ll make everyone think you’ve opened a bakery in your kitchen. As they say, the way to anyone’s heart is through fresh-baked bread, and these beauties prove it. Ready to turn that “waste” into wow? Let’s get baking!
Why You’ll Love This Sourdough Discard Blueberry Bagels Recipe
The Perfect Balance of Sweet and Tangy
These bagels hit all the right notes. The sourdough discard adds a subtle tanginess that perfectly complements the natural sweetness of fresh or frozen blueberries. The result? A complex, sophisticated flavor that makes plain bagels seem boring by comparison. The chewy texture you expect from a proper bagel is absolutely there, with a golden-brown crust that shatters just slightly when you bite into it.
Save Money and Reduce Waste
Making bagels at home costs a fraction of what you’d pay at a bakery, and you get to use up that sourdough discard instead of throwing it away. No more guilt about discarding perfectly good starter! Plus, you control exactly what goes into your bagels – no preservatives, no mysterious ingredients, just wholesome flour, water, and those gorgeous blueberries.
Customizable and Family-Friendly
The beauty of this recipe is its versatility. Swap blueberries for chocolate chips if you’re feeling indulgent, or add a swirl of cinnamon sugar. Kids absolutely love helping shape the bagel rings, making this a wonderful family activity. If you enjoyed making our sourdough discard cinnamon rolls, you’ll appreciate how this recipe brings that same hands-on fun with an even simpler process.
Better Than Store-Bought Every Time
Once you taste a warm, homemade bagel fresh from your oven, there’s no going back. The texture, the flavor, the satisfaction of making them yourself – it’s incomparable. Make a double batch and freeze half for easy breakfast options all month long!
How to Make Sourdough Discard Blueberry Bagels
Quick Overview
This recipe creates beautifully chewy bagels with pockets of jammy blueberries throughout. The sourdough discard adds depth of flavor without requiring the long fermentation time of traditional sourdough. The process involves mixing a simple dough, shaping it into rings, giving the bagels a quick boil (the secret to that perfect chewy texture), and then baking until golden brown.
Time Breakdown:
- Prep Time: 20 minutes
- Rest Time: 1 hour
- Boil & Bake Time: 25 minutes
- Total Time: 1 hour 45 minutes
- Yield: 8 large bagels
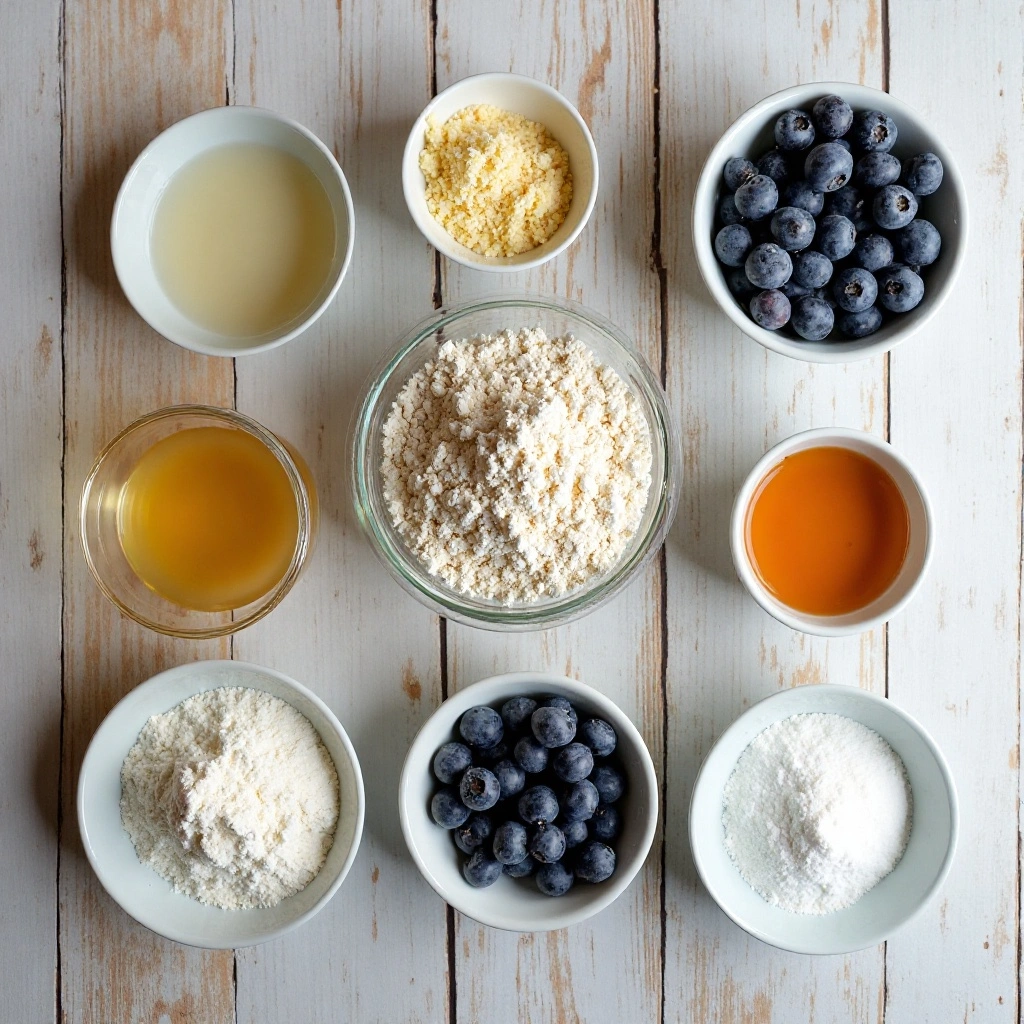
Key Ingredients for Sourdough Discard Blueberry Bagels
For the Bagel Dough:
- 1 cup (240g) sourdough discard, unfed (straight from the fridge is fine)
- 3½ cups (420g) bread flour or all-purpose flour
- 1 cup (240ml) warm water
- 2 tablespoons honey or maple syrup
- 2 teaspoons salt
- 1 tablespoon instant yeast
- 1½ cups (220g) fresh or frozen blueberries (if using frozen, don’t thaw)
For Boiling:
- 8 cups water
- 2 tablespoons honey or brown sugar
For Topping (Optional):
- Everything bagel seasoning
- Coarse sea salt
- Raw sugar for a sweet crust
- Egg wash (1 egg beaten with 1 tablespoon water)
Step-by-Step Instructions
Prepare the Dough
Start by gathering all your ingredients and measuring them out. In a large mixing bowl, combine the warm water, honey, and instant yeast. Stir gently and let it sit for about 5 minutes until the mixture becomes slightly foamy. This activates the yeast and ensures your bagels will have a good rise.
Add your sourdough discard to the yeast mixture and whisk until it’s well incorporated. The mixture will look a bit lumpy and that’s perfectly fine. Now add the flour and salt. Using a wooden spoon or your hands, mix everything together until a shaggy dough forms. Don’t worry if it looks rough at this point.
Turn the dough out onto a lightly floured surface and knead for about 8-10 minutes. You want the dough to become smooth and elastic. It should spring back when you poke it. If the dough feels too sticky, add a tablespoon of flour at a time, but be careful not to add too much – bagel dough should be fairly stiff compared to regular bread dough.
Add the Blueberries
Once your dough is smooth, flatten it into a rectangle about 1 inch thick. Scatter the blueberries evenly over the surface. Fold the dough over itself a few times to distribute the berries throughout. Some will burst and create beautiful purple streaks – this is exactly what you want! Knead gently for another minute or two to incorporate the berries, but don’t overwork it or all the berries will completely burst.
Shape the dough into a ball and place it in a lightly oiled bowl. Cover with a damp kitchen towel or plastic wrap and let it rest in a warm spot for about 1 hour, or until it’s noticeably puffy (it won’t quite double in size like regular bread dough).
Shape the Bagels
After the dough has rested, turn it out onto a clean work surface. Divide it into 8 equal pieces – a kitchen scale is helpful here for uniform bagels. Each piece should weigh about 120-130g.
To shape each bagel, roll a piece of dough into a smooth ball. Poke your thumb through the center of the ball to create a hole. Now gently stretch and rotate the dough, gradually enlarging the hole until it’s about 2 inches in diameter. Remember that the hole will shrink during boiling and baking, so make it larger than you think it should be!
Place the shaped bagels on a parchment-lined baking sheet, spacing them about 2 inches apart. Cover them loosely with a kitchen towel and let them rest for 10 minutes while you prepare the water bath.
Boil the Bagels
This is the secret step that makes bagels bagels! Fill a large, wide pot with 8 cups of water and add 2 tablespoons of honey or brown sugar. Bring it to a rolling boil over high heat, then reduce to a gentle boil.
Preheat your oven to 425°F (220°C) while the water is heating.
Working in batches of 2-3 bagels at a time (don’t overcrowd the pot), carefully slide the bagels into the boiling water. They’ll sink briefly then float to the surface. Boil for 1 minute on the first side, then flip them with a slotted spoon and boil for 1 minute on the second side.
Use the slotted spoon to remove the bagels from the water, letting excess water drain off, and place them back on the parchment-lined baking sheet. The bagels will look puffy and shiny at this point.
Add Toppings and Bake
If you want a shiny, golden finish, brush the tops of the boiled bagels with egg wash. This is also the time to add any toppings – sprinkle on everything bagel seasoning, coarse salt, or raw sugar while the egg wash is still wet so they’ll stick.
Place the baking sheet in your preheated oven and bake for 20-25 minutes, or until the bagels are deeply golden brown on top. The blueberries may leak slightly and caramelize on the pan – this is normal and adds extra flavor!
Remove from the oven and let the bagels cool on a wire rack for at least 10 minutes before slicing. I know it’s tempting to eat them immediately, but letting them cool just a bit makes them easier to slice and allows the texture to set perfectly.
What to Serve Sourdough Discard Blueberry Bagels With
These bagels are incredibly versatile! Here are my favorite ways to enjoy them:
Classic Cream Cheese Spread: A thick layer of plain or vanilla cream cheese lets the blueberry flavor shine. You can also mix in a bit of lemon zest to the cream cheese for an extra pop.
Sweet Butter and Honey: Sometimes simple is best. Warm butter melting into the nooks and crannies with a drizzle of honey is absolutely divine.
Nut Butter and Banana: Spread almond or peanut butter on your toasted bagel and top with banana slices for a protein-packed breakfast.
Greek Yogurt and Fresh Berries: For a lighter option, spread thick Greek yogurt on your bagel and add fresh strawberries or more blueberries on top.
Breakfast Sandwich: These work beautifully as breakfast sandwich buns. Add scrambled eggs, cheese, and turkey sausage for a hearty morning meal.
Pair With: Fresh fruit salad, hot coffee or tea, orange juice, or a refreshing smoothie.
Top Tips for Perfecting Sourdough Discard Blueberry Bagels
Use Bread Flour for Chewier Texture
While all-purpose flour works fine, bread flour has higher protein content which creates that signature chewy bagel texture. If you only have all-purpose flour, consider adding 1-2 tablespoons of vital wheat gluten to boost the protein.
Don’t Skip the Boiling Step
I know it seems unusual, but boiling is what makes bagels different from regular bread rolls. It sets the crust and creates that distinctive chewy exterior. If you skip this step, you’ll end up with bread rolls, not bagels.
Make the Hole Bigger Than You Think
This is the most common mistake! The hole shrinks significantly during boiling and baking. If you start with a small hole, you’ll end up with a roll that has a tiny dimple instead of a proper bagel. Aim for a 2-inch diameter hole before boiling.
Frozen Blueberries Work Great
Don’t thaw frozen blueberries before adding them to the dough. Frozen berries hold their shape better and won’t turn your entire dough purple. They’ll thaw perfectly during baking.
Check Your Yeast
Make sure your yeast is fresh and active. If it doesn’t foam up when mixed with warm water and honey, it’s probably dead and your bagels won’t rise properly. Always check the expiration date!
Don’t Overwork the Dough
Once you add the blueberries, handle the dough gently. Overworking will burst all the berries and create a uniform purple dough instead of beautiful pockets of fruit.
Water Temperature Matters
The water should be warm to the touch but not hot (around 100-110°F). If it’s too hot, it will kill the yeast. If it’s too cold, the yeast won’t activate properly.
Storing and Reheating Tips
Room Temperature Storage: Store completely cooled bagels in an airtight container or resealable bag at room temperature for up to 2 days. Don’t refrigerate them as this will make them go stale faster!
Freezing for Later: These bagels freeze beautifully! Once completely cool, slice them in half (this makes reheating much easier), then wrap each bagel individually in plastic wrap or aluminum foil. Place all wrapped bagels in a freezer-safe bag and freeze for up to 3 months. Label the bag with the date so you remember when you made them.
Reheating from Frozen: For the best texture, toast frozen bagel halves directly from the freezer in your toaster or toaster oven. No need to thaw! They’ll taste fresh-baked. Alternatively, wrap a frozen bagel in a damp paper towel and microwave for 30-40 seconds, then toast for a crispy exterior.
Refreshing Day-Old Bagels: If your bagels have lost their fresh-from-the-oven texture, sprinkle them lightly with water and warm in a 350°F oven for 5-7 minutes. This helps restore some of the original texture.
Tips for Avoiding Common Baking Mistakes
Mistake: Dense, Heavy Bagels
Solution: This usually means you added too much flour or didn’t knead the dough enough. Bagel dough should be stiff but still pliable. Knead for the full 8-10 minutes to develop the gluten properly. Also make sure your yeast is active – dead yeast won’t help your bagels rise.
Mistake: Bagels Spreading During Boiling
Solution: Let the shaped bagels rest for the full 10 minutes before boiling. This resting period allows the gluten to relax, which prevents them from losing their shape. Also, don’t let them over-proof – they should be puffy but not doubled in size.
Mistake: Pale, Undercooked Bagels
Solution: Make sure your oven is fully preheated to 425°F. Use an oven thermometer to verify the temperature is accurate. The bagels need high heat to develop that golden-brown crust. Bake them for the full 20-25 minutes – don’t be afraid of color!
Mistake: All Blueberries Sinking to Bottom
Solution: Toss the blueberries very lightly with a teaspoon of flour before adding them to the dough. This helps them stay suspended throughout the bagel. Also, fold them in gently rather than kneading vigorously.
Mistake: Bagels Sticking to Parchment
Solution: Make sure the boiled bagels aren’t too wet when you place them on the baking sheet. Lift them with a slotted spoon and let excess water drip off for a few seconds. You can also lightly oil the parchment paper before placing the boiled bagels on it.
Mistake: Tough, Rubbery Texture
Solution: Don’t over-boil the bagels. One minute per side is plenty. Longer boiling time creates a thicker, tougher skin that results in a rubbery texture. Also avoid overbaking – remove them as soon as they’re golden brown.
Frequently Asked Questions
Can I use active sourdough starter instead of discard?
Yes, absolutely! Active starter works beautifully in this recipe. The flavor will be slightly more tangy, and your bagels might rise a bit more. You can reduce the yeast to 1½ teaspoons if you’re using very active starter, though the full amount still works fine.
Do I need to feed my sourdough discard before using it?
No need! This recipe is specifically designed for unfed discard straight from your refrigerator. That’s what makes it so convenient – you’re literally using what you’d otherwise throw away.
Can I make these bagels without yeast?
Not with this particular recipe. The yeast is essential for the rise and texture. If you want a completely yeast-free sourdough bagel, you’d need a different recipe that relies solely on active sourdough starter and requires a much longer fermentation time (12-24 hours).
What if I don’t have honey?
You can substitute maple syrup, agave nectar, or even regular white sugar. The honey adds a subtle sweetness and helps with browning, but any sweetener will work. For the boiling water, brown sugar is a great alternative to honey.
Can I use whole wheat flour?
Yes, but I recommend substituting only half the flour with whole wheat. Use 1¾ cups bread flour and 1¾ cups whole wheat flour. Using all whole wheat will make the bagels quite dense. You may also need to add a bit more water as whole wheat flour absorbs more liquid.
Why are my bagels wrinkly after baking?
Wrinkly bagels usually mean they over-proofed (rose too much) before boiling. Make sure you’re only letting them rest for 1 hour, and they should be puffy but not doubled. Also ensure you’re boiling them – this step sets the crust and prevents wrinkling.
Can I make these bagels dairy-free?
Yes! This recipe is naturally dairy-free as written. Just skip the egg wash or use a plant-based milk wash instead. Make sure to serve them with dairy-free spreads like coconut cream cheese or nut butter.
How do I know when the bagels are done baking?
The bagels should be deeply golden brown on top and sound hollow when you tap the bottom. Internal temperature should be around 200-210°F if you want to use a thermometer. Don’t underbake – a good color means good flavor!
Can I add other fruits or mix-ins?
Definitely! Try diced strawberries, raspberries, chocolate chips, dried cranberries, or even diced apples with cinnamon. Keep the total amount of mix-ins to about 1½ cups so the dough structure isn’t compromised.
My dough is too sticky to work with. What should I do?
Add flour one tablespoon at a time while kneading until the dough is manageable but still slightly tacky. Bagel dough should be stiffer than regular bread dough but not completely dry. You can also lightly flour your hands and work surface.
Can I make the dough the night before?
Yes! After the first rise, you can punch down the dough, cover it tightly, and refrigerate overnight. The next day, let it come to room temperature for about 30 minutes before shaping. The cold fermentation actually develops more flavor!
Nutrition Information
| Nutrient | Per Bagel (1/8 recipe) |
|---|---|
| Calories | 245 |
| Protein | 8g |
| Carbohydrates | 50g |
| Fiber | 3g |
| Sugar | 8g |
| Fat | 1g |
| Sodium | 580mg |
| Calcium | 15mg |
| Iron | 2.5mg |
Note: Nutrition values are approximate and will vary based on specific ingredients and toppings used.
Final Thoughts
Making sourdough discard blueberry bagels at home is easier than you might think, and the results are absolutely worth it. There’s something incredibly satisfying about pulling a batch of golden, fragrant bagels from your oven, knowing you made them yourself and put that sourdough discard to good use.
These bagels have become a weekend staple in my kitchen. My family requests them constantly, and I love that I can make a big batch, freeze half, and have easy breakfasts ready to go for busy mornings. The combination of tangy sourdough and sweet blueberries just works perfectly together.
Don’t be intimidated by the boiling step – it’s actually quite easy and makes all the difference in texture. Once you’ve made these a couple of times, the whole process becomes second nature.
I’d love to hear how your bagels turn out! Feel free to experiment with different mix-ins and toppings to make this recipe your own. Happy baking, and enjoy every chewy, blueberry-studded bite!
Have you tried this recipe? Leave a comment below and let me know how it went! Don’t forget to pin this recipe for later and share it with your fellow sourdough enthusiasts!