Easy Strawberry Scones Sourdough Discard Better Than Bakery
There’s something magical about strawberry scones fresh from the oven—golden, flaky layers giving way to tender pockets of sweet, jammy berries. These strawberry scones sourdough discard treats transform your leftover starter into bakery-worthy pastries that’ll have everyone asking for seconds.
I stumbled upon this recipe during my early sourdough days when I couldn’t bear wasting another cup of discard. Now it’s my absolute go-to weekend baking project, taking just 30 minutes from bowl to table, and honestly? They taste even better than the fancy ones from that café downtown.
What Are Strawberry Scones Sourdough Discard?
Ever wondered what happens when British teatime meets American sourdough obsession? You get these beauties! Strawberry scones sourdough discard are tender, buttery pastries studded with fresh strawberries and enriched with that tangy sourdough starter you’d otherwise toss down the drain.
Why waste perfectly good fermented flour when it can create such magic? As they say, the way to anyone’s heart is through their stomach—and these scones are a direct route. Trust me, once you try this genius way to use up discard, you’ll never look at your sourdough jar the same way again!
Why You’ll Love This Strawberry Scones Sourdough Discard Recipe
The Ultimate Zero-Waste Baking Solution
Let’s be real—throwing away sourdough discard feels wrong. These scones solve that problem beautifully while giving you incredibly tender pastries with a subtle tang that perfectly balances the sweet strawberries. The sourdough discard adds moisture and creates the most amazing crumb texture you won’t find in regular scones.
Budget-Friendly Bakery Taste at Home
Why spend money on overpriced coffee shop scones when you can bake better ones at home? A pint of fresh strawberries, some pantry staples, and your “free” sourdough discard create a dozen magnificent scones for a fraction of the cost. You’re looking at maybe two dollars total versus seven dollars for a single bakery scone.
Customizable Sweet Perfection
Fresh strawberries create jammy pockets throughout each scone, but here’s where it gets fun—you control everything. Want them sweeter? Add a sugar glaze. Prefer them rustic? Brush with cream and coarse sugar. The vanilla-kissed dough works beautifully with the fruit, creating that perfect sweet-tart balance. If you loved my sourdough discard pancakes, you’ll absolutely adore how the discard works its magic here too!
The best part? These come together so quickly you can serve warm scones for breakfast without waking up at dawn. Now that’s what I call a win!
How to Make Strawberry Scones Sourdough Discard
Quick Overview
These strawberry scones sourdough discard are surprisingly easy to whip up, even for beginner bakers. The dough comes together in minutes, requires minimal kneading, and bakes into gorgeously golden scones with crispy edges and fluffy centers. The sourdough discard keeps them incredibly tender while adding that signature subtle tang that makes these absolutely addictive.
Time Breakdown:
- Prep Time: 15 minutes
- Chill Time: 15 minutes (optional but recommended)
- Bake Time: 18-22 minutes
- Total Time: 30-50 minutes
- Yield: 8 large scones
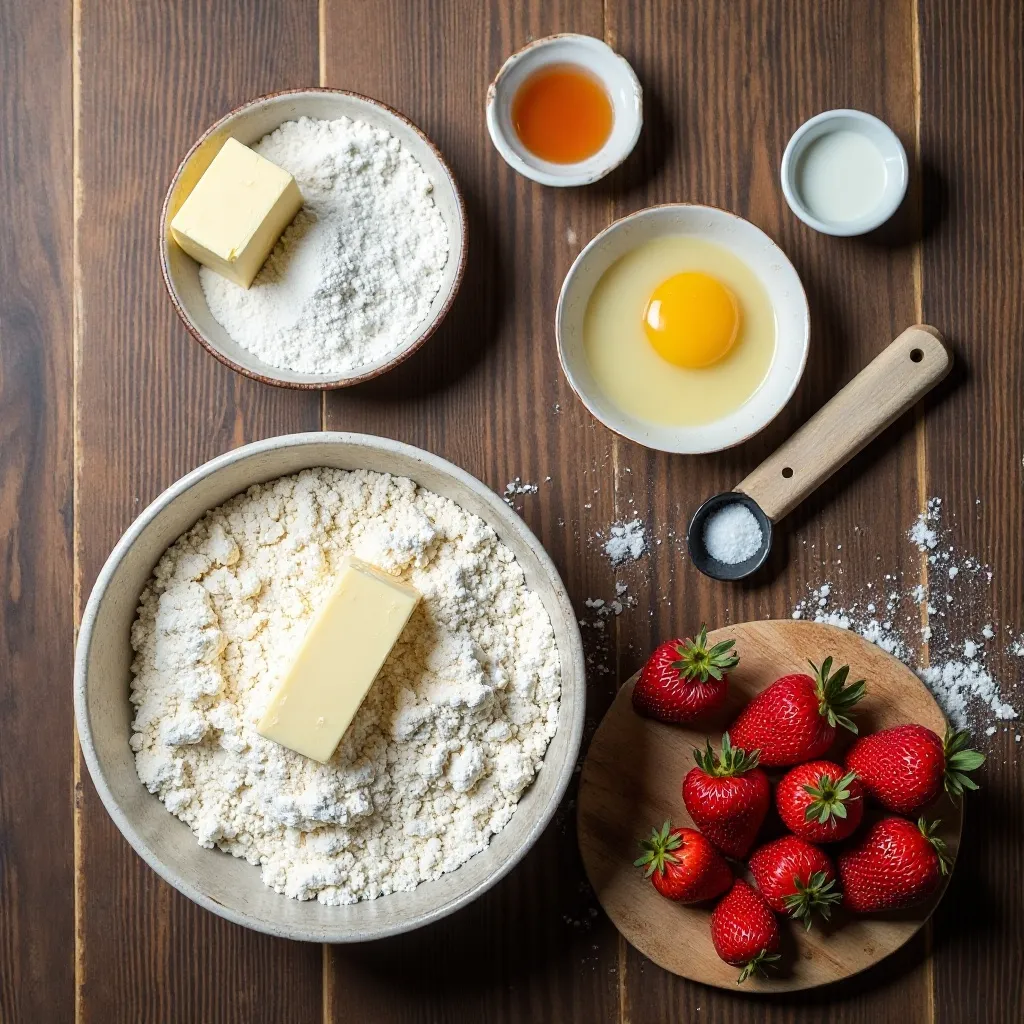
Key Ingredients for Strawberry Scones Sourdough Discard
Dry Ingredients:
- 2 cups (240g) all-purpose flour, plus extra for dusting
- ⅓ cup (65g) granulated sugar
- 1 tablespoon baking powder
- ½ teaspoon salt
- ¼ teaspoon baking soda
Wet Ingredients:
- ½ cup (113g) cold unsalted butter, cubed
- 1 cup (240g) sourdough discard, unfed and cold
- ¼ cup (60ml) heavy cream, plus extra for brushing
- 1 large egg
- 1 teaspoon vanilla extract
Add-ins:
- 1½ cups (225g) fresh strawberries, hulled and diced into small pieces
- 2 tablespoons coarse sugar for topping (optional)
Pro ingredient tip: Use cold ingredients straight from the fridge. This is crucial for flaky layers!
Step-by-Step Instructions
Step 1: Prepare Your Workspace
Preheat your oven to 400°F (200°C). Line a large baking sheet with parchment paper or a silicone mat. This prevents sticking and makes cleanup a breeze.
Step 2: Mix the Dry Ingredients
In a large mixing bowl, whisk together the flour, sugar, baking powder, salt, and baking soda. Make sure everything is evenly distributed. This ensures your scones rise evenly and have consistent flavor throughout.
Step 3: Cut in the Butter
Add your cold, cubed butter to the flour mixture. Using a pastry cutter, two forks, or your fingertips, work the butter into the flour until the mixture resembles coarse crumbs with some pea-sized butter pieces remaining. These butter chunks are your secret weapon for flaky layers. Don’t overwork it—you want to see those little butter bits!
Step 4: Prepare the Wet Mixture
In a separate bowl, whisk together the sourdough discard, heavy cream, egg, and vanilla extract until smooth and well combined. The mixture should be thick but pourable.
Step 5: Combine Wet and Dry
Pour the wet ingredients into the dry ingredients. Using a wooden spoon or rubber spatula, gently fold everything together until just combined. The dough will look shaggy and a bit rough—that’s exactly what you want. Overmixing creates tough scones, and nobody wants that!
Step 6: Fold in the Strawberries
Gently fold the diced strawberries into the dough. Pat the berries dry with paper towels first to prevent excess moisture. Be gentle here—you don’t want to crush the berries or overwork the dough. Some juice will release during baking and create those beautiful jammy pockets.
Step 7: Shape the Dough
Turn the dough out onto a lightly floured surface. Gently pat it into a circle about 1 inch thick and 8 inches in diameter. Don’t use a rolling pin—your hands are gentler and won’t deflate all that carefully preserved flakiness. If the dough feels too sticky, add a light dusting of flour.
Step 8: Cut Your Scones
Using a sharp knife or bench scraper, cut the circle into 8 equal wedges, like you’re slicing a pizza. For cleaner cuts, wipe your knife between slices. Transfer each wedge to your prepared baking sheet, spacing them about 2 inches apart.
Step 9: Optional Chill Time
Here’s a baker’s secret—pop the whole baking sheet into the freezer for 15 minutes before baking. This firms up the butter and helps the scones hold their shape while creating extra flaky layers. Not mandatory, but highly recommended!
Step 10: Add the Finishing Touches
Brush the tops of each scone with a little heavy cream or milk. This creates that gorgeous golden-brown finish. Sprinkle with coarse sugar for extra crunch and sweetness. I love the contrast of the crunchy sugar topping against the tender interior.
Step 11: Bake to Golden Perfection
Bake for 18-22 minutes, until the tops are golden brown and the bottoms are set. The edges should look slightly crispy, and a toothpick inserted into the center should come out clean (except for any jammy strawberry bits). Your kitchen will smell absolutely incredible right about now!
Step 12: Cool and Serve
Let the scones cool on the baking sheet for 5 minutes, then transfer to a wire rack. They’re best served slightly warm when the strawberries are still a bit melty and the texture is at its peak fluffy perfection.
What to Serve Strawberry Scones Sourdough Discard With
These scones are incredibly versatile and pair beautifully with so many things!
For Breakfast or Brunch: Serve alongside scrambled eggs and crispy bacon for a complete spread. A fresh fruit salad with mint adds a refreshing contrast to the rich, buttery scones.
Classic Tea Time: Nothing beats these scones with a proper cup of English breakfast tea or your favorite coffee. Add some clotted cream and strawberry jam for an authentic cream tea experience, even though the scones already have strawberries inside!
Beverage Pairings: Cold milk, hot chocolate, or a vanilla latte complement the strawberry flavor wonderfully. For something special, try them with iced strawberry green tea—the flavors mirror each other beautifully.
Make It a Meal: Create a brunch board with these scones as the centerpiece, surrounded by fresh berries, yogurt, honey, soft cheeses, and mixed nuts. It’s Instagram-worthy and delicious!
The beauty of these scones is they’re equally at home on an elegant brunch table or wrapped in a napkin for breakfast on the go.

Top Tips for Perfecting Strawberry Scones Sourdough Discard
Keep Everything Cold
This is the golden rule of scone-making! Cold butter creates steam pockets during baking, which equals flaky layers. If your kitchen is warm, chill your bowl and even your flour. I keep my butter in the freezer for 10 minutes before cutting it in.
Don’t Overmix the Dough
Once you add the wet ingredients, mix just until combined. You should still see streaks of flour—they’ll disappear during the folding process. Overmixing develops gluten, which makes tough, dense scones instead of tender, crumbly ones.
Pat, Don’t Roll
Use your hands to gently pat the dough into shape instead of rolling it. Rolling pins compress the layers and can make scones flat and tough. Light touches create light scones!
Fresh vs. Frozen Strawberries
Fresh strawberries work best, but if you’re using frozen, don’t thaw them first. Toss them straight from the freezer into the dough while still frozen. Thawed berries release too much liquid and can make soggy scones.
The Discard Doesn’t Need Feeding
Use your discard straight from the fridge, whether it’s one day old or a week old. The age doesn’t matter much for this recipe. Unfed discard actually works better because it has a more pronounced tang that balances the sweetness.
Size Matters for Even Baking
Cut your scones into equal-sized pieces so they bake evenly. Smaller scones will bake faster (check at 15 minutes), while larger ones may need the full 22 minutes.
Prevent Spreading
If your scones spread too much instead of rising up, your dough was probably too warm. Remember that optional freezer step? It really helps prevent this problem.
Test for Doneness
The tops should be golden brown, and if you lift a scone, the bottom should be set and lightly browned. If you’re unsure, insert a toothpick into the center—it should come out clean or with just a few moist crumbs.
Storing and Reheating Tips
Room Temperature Storage
Store completely cooled scones in an airtight container at room temperature for up to 2 days. Place parchment paper between layers to prevent sticking. They’ll stay relatively fresh, though the texture is definitely best on day one.
Refrigerator Storage
For longer storage, refrigerate the scones in an airtight container for up to 5 days. The sourdough discard actually acts as a natural preservative, helping these last a bit longer than regular scones. Let them come to room temperature before eating, or warm them up for better texture.
Freezing for Later
These freeze beautifully! Wrap each cooled scone individually in plastic wrap, then place them all in a freezer-safe bag or container. They’ll keep for up to 3 months. Label with the date so you remember when you made them.
Reheating Methods
Oven Method (Best): Preheat your oven to 350°F (175°C). Place scones on a baking sheet and warm for 5-7 minutes until heated through. This restores the crispy exterior.
Microwave Method (Quick): Microwave individual scones for 15-20 seconds. They won’t be crispy, but they’ll be warm and soft. Add an extra 5 seconds if heating from frozen.
From Frozen: You can actually bake these from frozen! Just add 3-5 extra minutes to the baking time. This means you can prep the dough, cut the scones, freeze them unbaked, and bake fresh scones whenever you want them.
Pro Storage Tip
For make-ahead convenience, prepare the dough through step 8, cut into wedges, and freeze unbaked. When you want fresh scones, bake them straight from frozen—no thawing needed! They’ll taste just as good as if you’d made them that morning.
Common Baking Mistakes to Avoid
Mistake #1: Using Warm Ingredients
This is the number one scone killer! Room temperature butter won’t create those flaky layers. Always use cold butter straight from the fridge, and keep your discard and cream cold too.
Mistake #2: Overworking the Dough
I see this constantly. People knead scone dough like it’s bread. Wrong! Scone dough should be handled minimally—just enough to bring it together. Those visible butter chunks and shaggy texture are features, not bugs.
Mistake #3: Cutting Strawberries Too Large
Big strawberry chunks create gaps in the dough and make scones fall apart. Dice them small—about ¼ inch pieces. They’ll distribute better and create more of that jammy effect throughout.
Mistake #4: Skipping the Chill Time
Yes, it’s optional, but skipping it often results in flat, spread-out scones. Those 15 minutes in the freezer make a real difference in the final shape and texture.
Mistake #5: Using Wet Strawberries
Always pat your strawberries dry! Excess moisture makes the dough soggy and affects how the scones rise. Even freshly washed berries need a good pat-down with paper towels.
Mistake #6: Incorrect Oven Temperature
An oven that’s too cool produces pale, dense scones. Too hot? Burnt outsides with raw middles. Use an oven thermometer to verify your oven’s actual temperature. Most home ovens run hot or cold.
Mistake #7: Opening the Oven Too Early
Resist the urge to peek! Opening the oven door during the first 15 minutes lets out heat and can cause scones to collapse. Wait until they’re nearly done before checking.
Mistake #8: Using Old Baking Powder
Baking powder loses potency over time. If yours is over 6 months old, test it by mixing a teaspoon with hot water—it should fizz vigorously. Weak baking powder means flat scones that won’t rise properly.
Frequently Asked Questions
Can I use sourdough starter instead of discard?
Yes, absolutely! Your active, fed starter works just as well. The main difference is discard has a more pronounced tangy flavor, while fed starter is milder. Either way, you’ll get delicious scones.
What if I don’t have heavy cream?
You can substitute with whole milk, half-and-half, or even buttermilk. The scones will be slightly less rich but still tasty. For extra richness, add a tablespoon of melted butter to the milk.
Can I make these with other berries?
Definitely! Blueberries, raspberries, or blackberries work wonderfully. You can also use a berry mix. Frozen berries work too—just don’t thaw them first.
Why are my scones spreading instead of rising?
This usually means your butter was too soft or the dough was overworked. Make sure everything stays cold and handle the dough gently. The freezer rest before baking also helps prevent spreading.
How do I know when the scones are done?
They should be golden brown on top, and the bottoms should be set and lightly browned. A toothpick inserted should come out clean (except for jammy strawberry bits). They should feel firm to a gentle touch.
Can I make the dough ahead of time?
Yes! Prepare the dough, cut into wedges, and refrigerate overnight or freeze for up to 3 months. Bake directly from cold or frozen, adding a few extra minutes to the baking time.
My scones turned out dry—what happened?
Dry scones usually mean too much flour (measure carefully!) or overbaking. They can also result from overmixing, which develops too much gluten. Make sure you’re measuring flour correctly by spooning it into the cup and leveling off.
Do I need to use unfed sourdough discard?
Unfed discard actually works better for this recipe! It has a tangier flavor that balances the sweetness. Fed starter is milder and slightly sweeter, but both work fine.
Can I add a glaze to these scones?
Absolutely! A simple vanilla glaze (powdered sugar, milk, and vanilla) or a strawberry glaze would be delicious. Wait until the scones are completely cool before glazing so it doesn’t melt off.
What’s the best way to cut the butter into the flour?
A pastry cutter works best, but you can also use two forks or even your fingertips. Work quickly to keep the butter cold, and stop when you have pea-sized pieces mixed with smaller crumbs.
Nutrition Information
| Nutrient | Per Scone (1 of 8) |
|---|---|
| Calories | 285 |
| Total Fat | 13g |
| Saturated Fat | 8g |
| Cholesterol | 55mg |
| Sodium | 340mg |
| Total Carbohydrates | 37g |
| Dietary Fiber | 2g |
| Sugars | 12g |
| Protein | 5g |
Note: Nutrition information is approximate and will vary based on specific ingredients used.
Final Thoughts
These strawberry scones sourdough discard have become my absolute favorite way to use up that jar of starter in my fridge. There’s something deeply satisfying about turning what would be waste into something so delicious and beautiful.
The combination of buttery, flaky layers with sweet-tart strawberry bursts and that subtle sourdough tang creates something really special. They’re fancy enough for company but easy enough for a lazy Sunday morning when you just want something homemade and comforting.
I love that this recipe gives you bakery-quality results without requiring any fancy equipment or advanced skills. If you can mix ingredients in a bowl and pat dough into a circle, you can make these scones. And honestly, even if your first batch isn’t perfect, they’ll still taste amazing!
The best part? Watching someone take that first bite of a warm scone, seeing their eyes light up, and knowing you made it yourself from ingredients you already had. That’s the magic of home baking right there.
So grab that sourdough discard, pick up some fresh strawberries, and give these a try this weekend. Your kitchen will smell incredible, your family will be impressed, and you’ll feel like a baking superstar. Plus, you’ll never look at your discard jar as waste again!
Happy baking, friends!